White chocolate buttercream icing
Cupcakes de vainilla super esponjosos
Ganache de chocolate (cupcakes decoration)
Carrot cake
Galletas de zanahoria
miércoles, 28 de septiembre de 2016

viernes, 23 de septiembre de 2016
{Irish tradicional food}
https://www.google.com.ar/webhp?sourceid=chrome-instant&ion=1&espv=2&ie=UTF-8#q=boxty%20recipe
https://www.google.com.ar/webhp?sourceid=chrome-instant&ion=1&espv=2&ie=UTF-8#q=black%20pudding%20recipe
http://www.bbc.co.uk/food/chefs/nigel_slater
https://www.google.com.ar/webhp?sourceid=chrome-instant&ion=1&espv=2&ie=UTF-8#q=irish%20scones
https://www.google.com.ar/webhp?sourceid=chrome-instant&ion=1&espv=2&ie=UTF-8#q=christmas%20cake
http://blogs.lanacion.com.ar/cocina-amateur/recetas-con-manzanaas/postre-irlandes-de-manzanas-con-canela-y-pasas/
jueves, 22 de septiembre de 2016
{Wilton recipes}
Macaron
http://www.wilton.com/french-macaron-cookies/WLPROJ-8606.html
Cake pops
http://www.wilton.com/basic-cake-pops/WLRECIP-376.html
Cake & cupcakes
http://www.wilton.com/chocolate-buttercream-icing/WLRECIP-42.html
http://www.wilton.com/white-chocolate-buttercream-icing/WLRECIP-139.html
http://www.wilton.com/creamy-vanilla-custard-cupcakes/WLRECIP-735.html
http://www.wilton.com/jelly-doughnut-muffins/WLRECIP-8253.html
http://www.wilton.com/lemon-lavender-cupcakes/WLRECIP-663.html
http://www.wilton.com/americas-celebration-cake/WLRECIP-109.html
http://www.wilton.com/chocolate-cake-with-chocolate-buttercream-icing/WLRECIP-358.html
http://www.wilton.com/lemon-cake/WLRECIP-298.html
http://www.wilton.com/chocolate-chocolate-cake/WLRECIP-92.html
http://www.wilton.com/chocolate-filling/WLRECIP-158.html
Fudge
http://www.wilton.com/fudge/WLRECIP-37.html
http://www.wilton.com/cake-brownies/WLRECIP-266.html
Tart
http://www.wilton.com/key-lime-mini-pies/WLRECIP-8535.html
http://www.wilton.com/baked-breakfast-egg-tarts/WLRECIP-8245.html
Cookies
http://www.wilton.com/chocolate-chip-cookies/WLRECIP-500.html
http://www.wilton.com/alfajores/WLTREAT-32.html
Bites
http://www.wilton.com/cheesy-muffin-tin-potato-tots/WLRECIP-8559.html
http://www.wilton.com/buffalo-chicken-bites-and-mini-apple-pies/WLRECIP-8566.html
http://www.wilton.com/bacon-cheddar-and-chive-corn-muffins/WLRECIP-8248.html
http://www.wilton.com/rosemary-and-pepper-crackers/WLTREAT-7.html
http://www.wilton.com/cranberry-and-black-pepper-gougeres/WLTREAT-25.html
http://www.wilton.com/orange-carrot-tea-bread/WLRECIP-5292.html
Quiche
http://www.wilton.com/zucchini-quiche/WLRECIP-778.html
http://www.wilton.com/caprese-quiche/WLRECIP-668.html
Pizza
http://www.wilton.com/breakfast-pizzas/WLPROJ-8642.html
http://www.wilton.com/sausage-and-pepper-pizza/WLRECIP-333.html
Chicken
http://www.wilton.com/crispy-roasted-lemon-chicken-legs/WLRECIP-8558.html
jueves, 15 de septiembre de 2016
{Betty Crocker}
Cheese and bacon grain scones
Chocolate scones
Bacon cheddar monkey bread
Chocolate malt ice-cream cake
http://www.bettycrocker.com/recipes/cake-batter-pancakes/b2b774ef-e2b8-45b5-86aa-5c8387009934
http://www.bettycrocker.com/recipes/rainbow-layer-cake/4969fed8-141e-45f5-9a04-e03addd20fbb
http://www.bettycrocker.com/recipes/lucky-charms-leprechaun-hat-cake/c0f41bac-b8c1-4c19-ab8e-5baadb88086f
http://www.bettycrocker.com/menus-holidays-parties/mhplibrary/birthdays/10-incredible-birthday-cakes
http://www.bettycrocker.com/recipes/chocolate-cherry-ice-cream-cake/8248b9c1-bb18-4ac2-a42a-2138381cccf2
http://www.bettycrocker.com/recipes/pepper-jack-cheese-quick-bread/36a964a8-a529-4b06-bd38-a53528e9038a
http://www.bettycrocker.com/recipes/cornbread-with-chiles-and-bacon/baa4b3ce-7523-4126-9860-a8ec9db5e69a
http://www.bettycrocker.com/recipes/dishes/breads-and-roll-recipes/cinnamon-roll-recipes
http://www.bettycrocker.com/recipes/courses/breakfast-and-brunch-recipes/scone-recipes
http://www.bettycrocker.com/recipes/dishes/dips
domingo, 11 de septiembre de 2016
{Sencillo y delicioso bizcocho de yogurt}

En el mercado (utilizando como medida el vaso del yogurt)
3 huevos
2 medidas de azúcar
1 yogurt natural (o de vainilla)
Ralladura de un limón (o 1 cucharada de esencia de vainilla, si se utiliza yogur de vainilla)
1 medida de aceite de girasol
3 medidas de harina (se puede reemplazar la harina y la levadura, por harina leudante)
1 cucharadita colmada de levadura química
1 pizca de sal
En la cocina
1) Precalentar el horno a 180º.
2) Untar con abundante manteca, un molde para cake.
3) Introducir los huevos y el azúcar en un bol grande. Batir hasta que blanquee y se vuelva espumoso.
4) Incorporar el yogurt, la ralladura de limón y el aceite. Batir de nuevo hasta obtener una mezcla uniforme.
5) Tamizar la harina junto con la levadura y la sal, sobre la mezcla anterior. Con ayuda de una espátula de cocina mezclar hasta que la harina esté completamente integrada y no queden grumos.
6) Repartir la masa dentro del molde y hornear durante unos 30/40 minutos o hasta que, al introducir una aguja dentro del bizcocho, esta salga limpia.
{Fabuloso pastel de chocolate, de los baker Brothers}

lunes, 15 de abril de 2013
La vida está hecha de pequeños detalles ... levantarte por las mañanas y despertar a tus hijas que están en su cama calentitas como un bollito recién hecho!, regar las plantas al sol y mojarte los pies, pintarte los labios de rojo para salir a tomar un café con lindas amigas al bar del pueblo :), mirar fijamente al sol hasta que te hace estornudar, sonreír a un desconocido y que te devuelva la sonrisa ... tantas cosas hacen que un día sea hermoso!!!!
Disfrutar de nuestra vida depende de no dejar pasar esos pequeños momentos que a veces se esconden inadvertidos entre el maremágnum del día a día. Disfrutar, a veces puede ser tan fácil como pegar un mordisquito a un jugoso pastel de chocolate como este :), no pensar en las calorías y dejarse llevar por la sencillez de esos pequeños placeres que nos regala la vida!!!.
Los fabulosos hermanos panaderos nos ofrecen un pastel super sencillo, de textura esponjosa y tierna que no os defraudará... quien se anima con él antes de que comience el calor y empecemos con los helados??? ;)
Fuente "Glorius British Grub" The fabulous baker brothers
Ingredientes:
- 170 gr de harina con levadura incorporada.
- 2 y 1/2 cucharadas de cacao puro en polvo.
- 1 cucharadita de bicarbonato.
- 115 gr de azúcar.
- 170 gr de Golden Syrup (yo lo sustituyo por jarabe de azúcar que venden en Ikea y hay quien lo hace con jarabe de maíz).
- 140 ml de leche.
- 140 ml de aceite de girasol.
- 2 huevos grandes.
Para la ganache de chocolate:
- 500 gr de chocolate para fundir.
- 500 ml de nata líquida.
- 1 cucharada de Golden Syrup.
Preparación:
- Precalentar el horno a 160º. Engrasar un molde alto de 18 o 20 cm. tened en cuenta que cuanto más grande sea el molde, más fino será el pastel y antes se horneará.
- En un bol grande introducir y mezclar los elementos secos. Añadir el Golden Syrup o jarabe de azúcar, la leche y mezclar muy bien con una batidora de varillas. Yo lo hago con la KA.
- Batir los huevos con el aceite e incorporar poco a poco a la anterior mezcla mientras batimos el conjunto. Introducir en el molde engrasado y hornear durante una hora o hasta que, al insertar un palillo salga seco. Este pastel crece en el horno, siempre deberéis llenar el molde no más de dos tercios de su capacidad.
- Mientras tanto haremos la ganache. Introducir en un bol resistente al calor todos los ingredientes. Disponer el bol sobre una olla de diámetro más pequeño que este, con agua hirviendo. Remover constantemente hasta que el chocolate esté completamente fundido y brillante. El agua hirviendo no debe tocar el fondo del bol.
- Reservar la ganache y dejar que se enfríe ligeramente mientras el pastel termina de hornearse. Os aconsejo que apartéis una pequeña cantidad de ganache para el relleno del pastel, de ese modo este se enfriará más, y tendrá más consistencia a la hora de rellenar.
- Retirar del horno el pastel y dejar enfriar dentro del molde. Volcar sobre una rejilla y dividir por la mitad. Cubrir una de las partes con la ganache que hemos reservado para el relleno y volver a poner la parte superior. Verter el resto de cobertura sobre el pastel dejando que el chocolate se reparta sobre toda la superficie y cubra sus lados. Una vez bien cubierto, dar un par de golpes secos a la rejilla sobre la que está colocado para que la cobertura se asiente y dejar enfriar completamente.
Fuente: lacocinadebabel.blogspot.com.ar
miércoles, 7 de septiembre de 2016
{Pan de ajo}

En el mercado
Baguettes
Manteca
Ajo
Perejil
En la cocina
1) Cortar las baguettes en rebanadas sin llegar hasta abajo.
2) En un bowl, mezclar la manteca con los dientes de ajo y el perejil muy picaditos.
3) Poner en cada raja de las baguettes un poco de esta manteca.
4) Hornear a 200º durante 10-15 minutos, hasta que el pan esté dorado.
5) Servir caliente.
{Pan dulce de Leipzig}

Ingredientes (para 2 stollen)
Esponja
30g de levadura prensada
½ taza de leche tibia
2 cucharadas de azúcar
1 cucharada de harina
Masa
3 yemas
1 taza de leche
100g de manteca derretida
200g de azúcar
ralladura de un limón
3 claras a nieve
harina c/n (1kg aprox.)
100g de pasas de uva sin semilla
100g de nueces picadas grueso
100g de almendras peladas
4 cucharadas de cáscaras de naranja abrillantadas
100g de avellanas peladas
100g de cerezas confitadas
Varios
Manteca derretida para pintar la masa
Preparación de la esponja
Disuelva la levadura en la leche tibia junto con las dos cucharadas de azúcar y la cucharada de harina. Bata todo hasta que se formen globitos en la superficie.
Tape flojamente y espere a que la levadura fermente y se transforme en una esponja.
Masa
Ponga las yemas en un bol y bátalas mientras le agrega la leche, la manteca derretida y tibia, el azúcar y la ralladura de limón.
Súmele la “esponja de levadura” y las claras batidas a nieve.
Bata la mezcla con la mano abierta mientras le incorpora la harina, hasta obtener un bollo tierno que no se pegotee y que se desprenda fácilmente de las paredes.
Coloque la masa en un bol limpio, tápela flojamente y déjela leudar al doble en un sitio tibio.
Cuando ya leudó, vuélquela sobre la mesa y mézclele las pasas, las nueces, las cáscaras de naranja, las almendras, las avellanas y las cerezas.
Vuelva a poner la masa en un bol. Tape otra vez bien flojita y deje leudar al doble en un sitio tibio.
Una vez que la masa haya leudado, divídala en dos porciones. Estire cada porción de masa sobre la mesa enharinada, y déle forma oval con un espesor de unos dos centímetros aproximadamente.
Pinte la superficie de cada ovalo, generosamente, con manteca derretida.
Ahora, doble cada ovalo de masa por la mitad, como si fuera a armar una empanada gigante.
Una vez moldeados así los stollen, levántelos cuidadosamente y acomódelos en placas enmantecadas y enharinadas.
Tápelos flojamente y ¡déjelos leudar nuevamente! No se desanime que ya queda poco…
Cocínelos en horno caliente hasta que queden doraditos.
Retire los stollen del horno, píntelos exageradamente con manteca derretida y enseguida ahogüelos con azúcar impalpable tamizada.
Déjelos enfriar sobre una rejilla y… ¡a la carga!


martes, 6 de septiembre de 2016
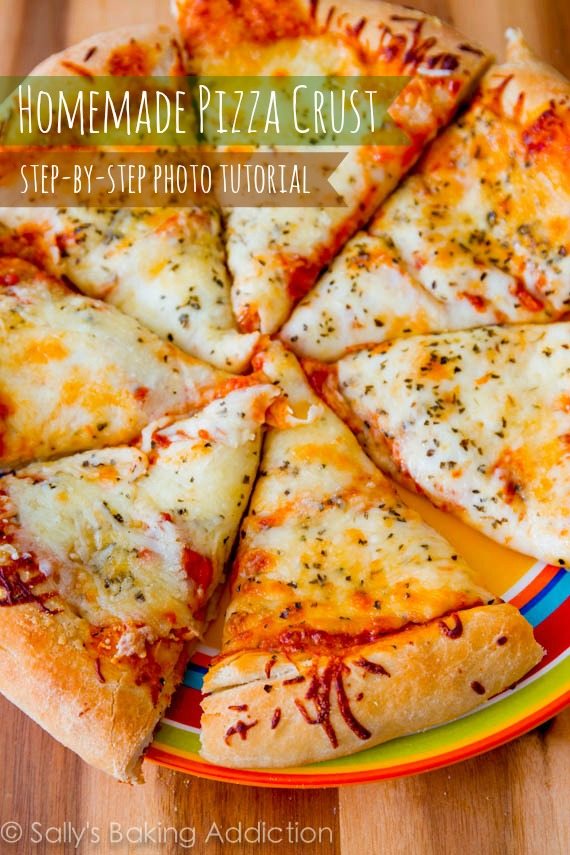
{Homemade pizza crust}
En el mercado
All pizza doughs recipes are different, but they typically all have the same ingredients: flour, yeast, water, salt, oil, and some may have sugar. Here is the breakdown of what I use in my recipe.
Yeast. I use Red Star Platinum yeast. I have the best results in my breads when I use their platinum line. Though I am being compensated for sponsoring Red Star Yeast, please know that I’ve been an avid user ever since I began to bake with yeast. Their Platinum line is fantastic; its careful formula strengthens your dough and makes making working with yeast simple. I use only enough yeast to get the job done; I don’t like pizza dough to taste “yeasty.” (Technical terms here, of course.) 1 standard packet (2 and 1/4 teaspoons) is what you need for my pizza crust recipe.
Water. I tested this recipe with many different amounts of water over the past few weeks. I find that 1 and 1/3 cups is the perfect number. Please use lukewarm water (105F – 115F). Anything over 120F will kill your yeast.
Flour. Please use unbleached all-purpose white flour in this recipe. Bleaching the flour strips away some of the protein, which will affect how much water your flour absorbs in this recipe. You may use bread flour instead, but you’ll have to increase the water by a couple Tablespoons since bread flour contains more protein than all-purpose. I do not know how to make this pizza crust gluten free. For the best results, just stick to the recipe as written.
Oil. Extra virgin gives this pizza crust the best taste. You’ll also line your bowl with olive oil as the dough rises and brush your dough with olive oil before layering on the toppings. This prevents the crust from getting soggy from the toppings.
Salt. Salt gives my pizza crust a little flavor. Pizza dough without salt tastes bland regardless of the toppings. I tested with two different amounts and 3/4 teaspoon is perfect.
Sugar. I add a touch of sugar to my pizza dough recipe. Sugar increases the yeast’s activity, while salt can control it. Furthermore, a slight touch of sugar will tenderize your dough, especially when paired with the olive oil.
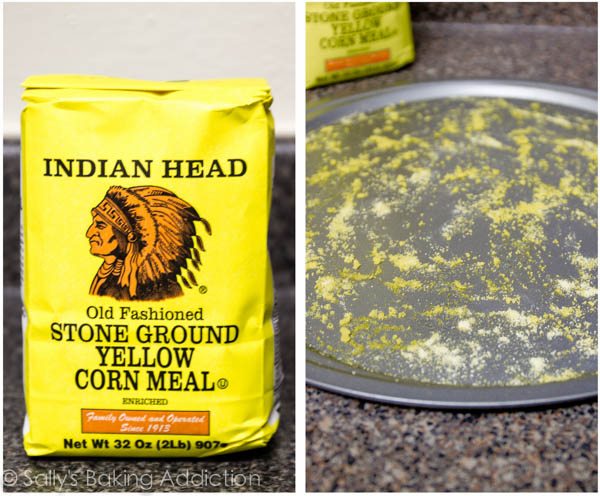
Cornmeal. Not all pizza dough recipes use cornmeal to dust the pan, but I prefer it. The main reason you sprinkle cornmeal onto the bottom of your pizza pan is so that the pizza won’t stick to the bottom of the pan. It gives the pizza crust a little flavor and crispy texture as well. You could just use regular flour to dust the pan, but you’ll lose the flavor cornmeal provides.
How to make Homemade Pizza Crust. A step-by-step photo tutorial by sallysbakingaddiction.com
Freezing Instructions
It’s important to know that this recipe is enough to make two 12-inch pizzas. If you do not need two pizzas, here are the freezing instructions:
After the pizza dough has risen and you divide the dough in half to form into two pizzas (step 7), you may freeze one of the balls of dough to make a pizza at a later time. Or you may simply freeze both balls of dough, separately. Lightly spray all sides of the dough ball(s) with nonstick spray or lightly coat all sides with olive oil. Place the dough ball(s) into individual zipped-top bag(s) and seal tightly, squeezing out all the air. Freeze for up to 3 months.
Thawing Instructions
Put your frozen pizza dough ball(s) in the fridge overnight or for about 12 hours to thaw. When ready to make the pizza(s), remove the dough from the refrigerator and set out on the counter to rest for 30 minutes and come to room temperature. Continue with step 8.
Do NOT feel overwhelmed. I made sure to break everything down very easily, so a lot of the text in this recipe is me being as thorough as possible. Be sure to use the photos below this recipe as a visual guide.
Sally’s tip: Be gentle with your dough at ALL times. Let your dough rest as I instruct in the recipe below. It’s fragile and should be handled with care.
Porciones: 2 pizzas de 30,5 cm
Tiempo de preparación: 2 h y 15 m
Tiempo total: 2h y 30 m
Follow these easy instructions for creating a thick & chewy pizza crust at home. I do not know how to make this pizza crust gluten free. For the best results, just stick to the recipe as written.
En el mercado
2 y 1/4 cucharitas de té de Red Star Platinum yeast (1 standard packet, 7g)*
1 y 1/3 tazas (320ml) de agua tibia (105-115F degrees)
3 y 1/2 tazas (440g) unbleached all-purpose flour, plus more as needed
2 cucharadas (30ml) de aceite de oliva
3/4 cucharitas de té de sal
1 cucharadas (13g) de azúcar granulada
Harina de maíz, para empolvorear la pizzera
En la cocina
1) En un bowl grande (or the bowl of your stand mixer fitted with a hook attachment), combinar la levadura con el agua tibia. Mezclar y dejar reposar durante 5 minutos, o hasts que la levadura esté espumosa y disuelta. Esto se llama "proofing" la levadura. Si la levadura no se disuelve, la levadura está "muerta". Comienza de nuevo con levadura activa.
1) En un bowl grande (or the bowl of your stand mixer fitted with a hook attachment), combinar la levadura con el agua tibia. Mezclar y dejar reposar durante 5 minutos, o hasts que la levadura esté espumosa y disuelta. Esto se llama "proofing" la levadura. Si la levadura no se disuelve, la levadura está "muerta". Comienza de nuevo con levadura activa.
2) nd warm water. Stir it around and let sit for 5 minutes of until the yeast is foamy and dissolved. This is called "proofing" the yeast. If the yeast doesn't dissolve, your yeast is dead. Start again with active yeast. Add flour, olive oil, salt, and sugar. Mix by hand or with the dough hook on low speed for 1 minute.
Once all of the ingredients are mixed, knead for 7 minutes by hand or with your dough hook on low-medium speed. If your dough is too wet, add up to 1/4 cup more flour. After kneading, your dough should be smooth and elastic. Poke it with your finger - if it slowly bounces back, your dough is ready to rise. If not, keep kneading.
Shape the dough into a ball and place in a large mixing bowl that has been coated lightly with olive oil. Turn it over to coat all sides. Cover tightly with plastic wrap and allow to rise in a warm environment (about 75F-80F).
For the warm environment, I heat up my oven to 200F. Then, I turn the oven off and keep the door slightly ajar (I opened it wide for this picture). This will be a warm environment for your dough to rise. After about 30 minutes, I close the oven door to trap warmish air inside with the rising dough.
Depending on your type of yeast, your dough will have doubled in size in about 1 - 2 hours. I use Red Star Platinum and my dough took 1 hour, 20 minutes.
Punch the dough down to release the air.
Divide the dough into two. Roll each half into a ball and let rest in two separate bowls lightly covered for 15 minutes. You may freeze one of the dough balls at this point to use at a later time. Please read above in the post for freezing instructions.
Preheat oven to 475F degrees. Allow to heat for at least 30 full minutes. Every inch of your oven needs to be very, very hot. Grease and dust 2 baking sheets with nonstick spray or with olive oil. Sprinkle with cornmeal (preferred for flavor and texture) or flour (not preferred). Please read above in the post for why cornmeal is preferred.
Prepare your favorite toppings. May I suggest my recipe for a simple extra cheese pizza?
After 15 minutes, flatten each ball of dough 1 at a time on a lightly floured surface or on a silicone baking mat. You could also do this directly on your cornmeal lined pizza pan. Flatten into a 12-inch round circle, flattening and stretching the dough. If using a pizza stone, place the dough directly on baker's peels dusted with cornmeal.
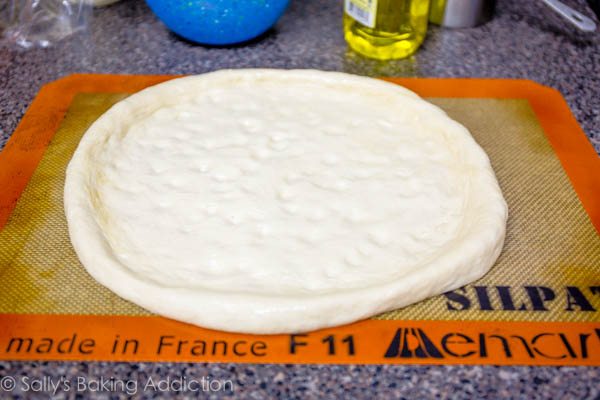
Lift the edge of the dough up to create a lip around the edges. I simply pinched the edges up to create the rim like this. To prevent the filling from making your pizza crust soggy, brush the top lightly with olive oil. Using your fingers, push dents into the surface of the dough to prevent bubbling. Let rest for 15 minutes before topping.
Top with your favorite toppings and bake for 12-15 minutes. For the last minute, I move the oven rack to the top rack to really brown the edges. That's optional.
Slice hot pizza and serve immediately. Store leftover pizza covered tightly in the refrigerator and reheat as you prefer. Baked pizza slices may be frozen up to 1 month.
Additional Notes:
*You may also substitute active dry yeast on an equal basis for the instant yeast. Expect an approximately 50% slower rise time.
© SALLY’S BAKING ADDICTION. All images & content are copyright protected. Please do not use my images without prior permission. If you want to republish this recipe, please re-write the recipe in your own words, or link back to this post for the recipe.
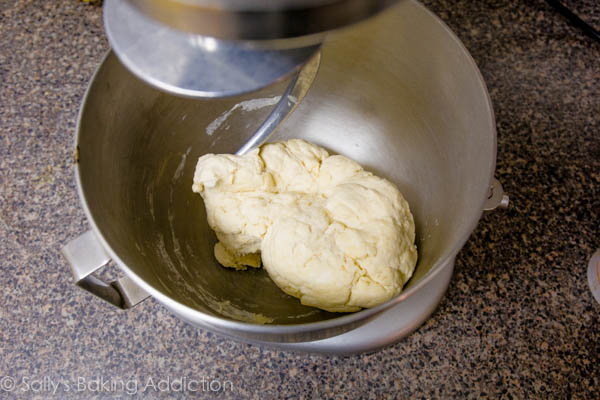
1) In a large mixing bowl or the bowl of your stand mixer fitted with a hook attachment, combine the 1 packet of yeast and 1 and 1/3 cups warm water. Stir it around and let sit for 5 minutes or until the yeast is foamy and dissolved. This is called “proofing” the yeast. If the yeast doesn’t dissolve, your yeast is dead. Start again with active yeast. Add 3 and 1/2 cups flour, 2 Tablespoons olive oil, 3/4 teaspoon salt, and 1 Tablespoon sugar. Mix by hand or with the dough hook on low speed for 1 minute:
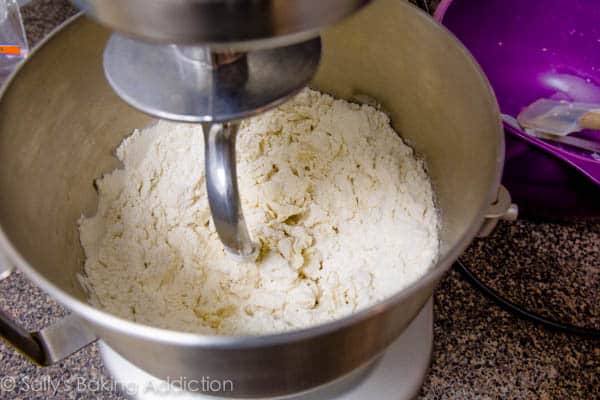
2) Once all of the ingredients are mixed, knead for 7 minutes by hand or with your dough hook on low-medium speed. If your dough is too wet, add up to 1/4 cup more flour. After kneading, your dough should be smooth and elastic. Poke it with your finger – if it slowly bounces back, your dough is ready to rise. If not, keep kneading.
Here is my dough halfway through mixing with the dough hook (after about 3 minutes).
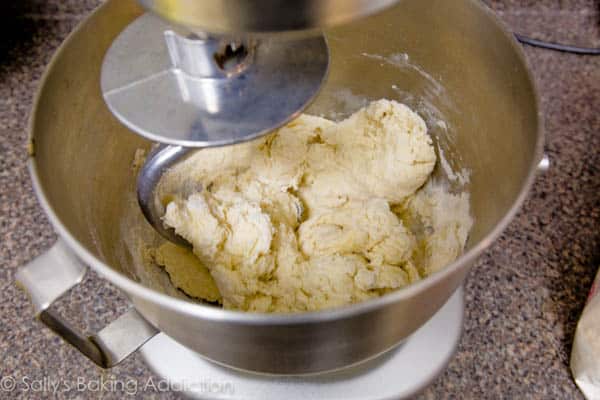
Here is my dough when it is ready to rise, after 7 minutes:
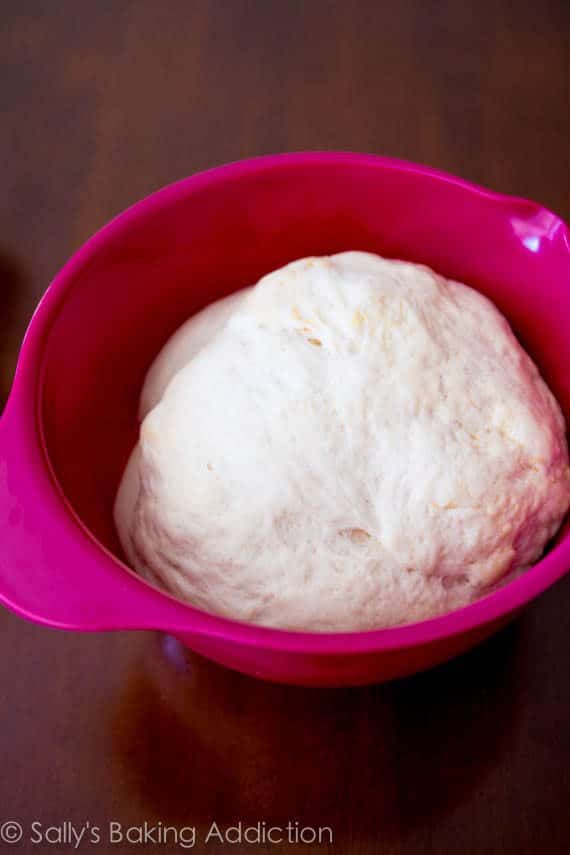
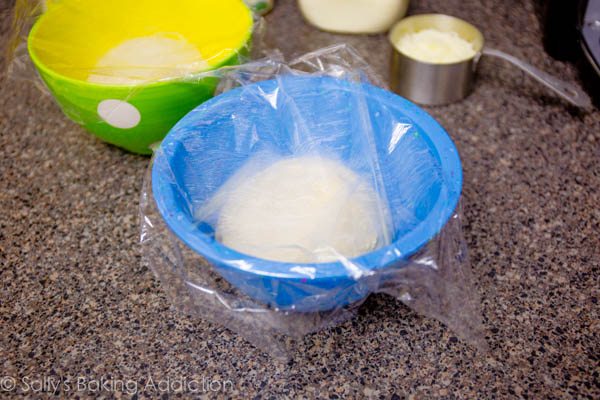
3) Shape the dough into a ball and place in a large mixing bowl that has been coated lightly with olive oil. Turn it over to coat all sides. Cover tightly with plastic wrap and allow to rise in a warm environment (about 75F-80F).

4) For the warm environment, I heat up my oven to 200F. Then, I turn the oven off and keep the door slightly ajar (I opened it wide for this picture). This will be a warm environment for your dough to rise. After about 30 minutes, I close the oven door to trap warmish air inside with the rising dough.
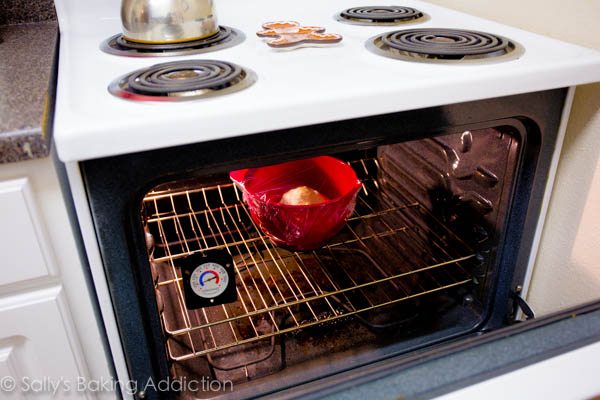
5) Depending on your type of yeast, your dough will have doubled in size in about 1 – 2 hours. I use Red Star Platinum and my dough took 1 hour, 20 minutes.
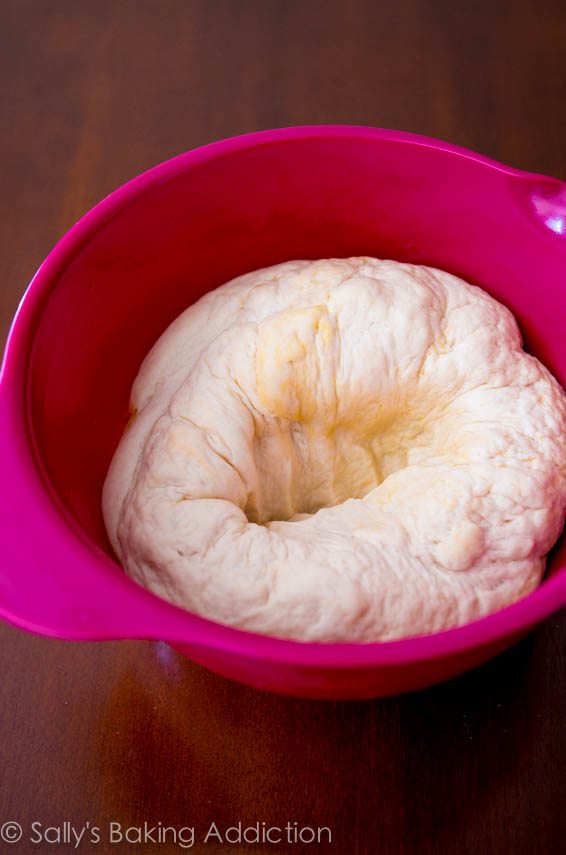
6) Punch the dough down to release the air. Watch it deflate!
7) Divide the dough into two. Roll each half into a ball and let rest in two separate bowls lightly covered for 15 minutes. You may freeze one of the dough balls at this point to use at a later time. Please read above in the post for freezing instructions.
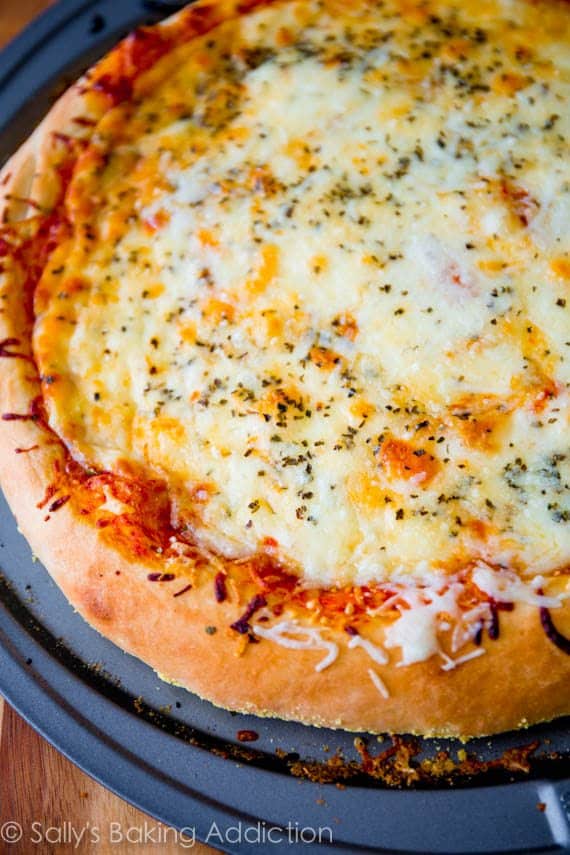
8) Preheat oven to 475F degrees. Allow to heat for at least 30 full minutes. Every inch of your oven needs to be very, very hot. Grease and dust 2 baking sheets or pizza pans with nonstick spray or with olive oil. Sprinkle with cornmeal (preferred for flavor and texture) or flour (not preferred). Please read above in the post for why cornmeal is preferred.
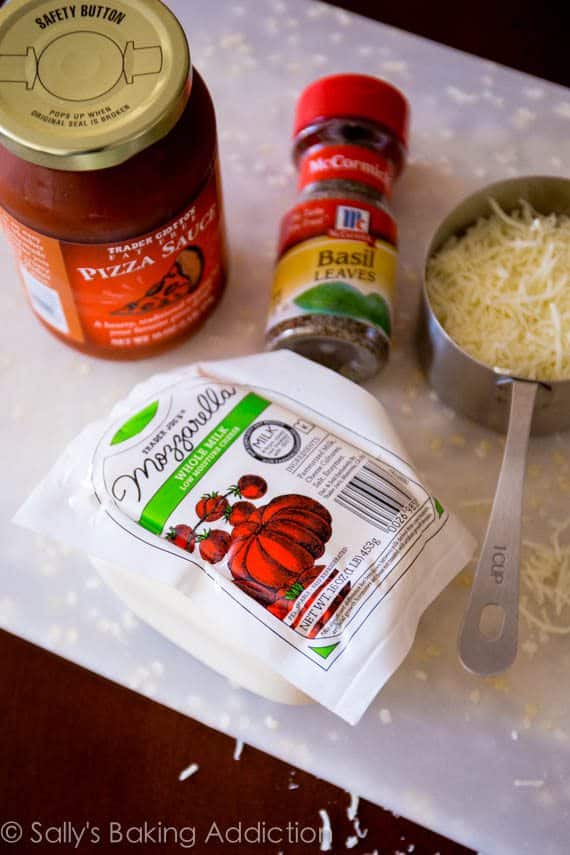
9) Prepare your favorite toppings. May I suggest my recipe for a simple extra cheese pizza? 🙂 Use homemade tomato sauce if you prefer.
10) After 15 minutes, flatten each ball of dough 1 at a time on a lightly floured surface or on a silicone baking mat.
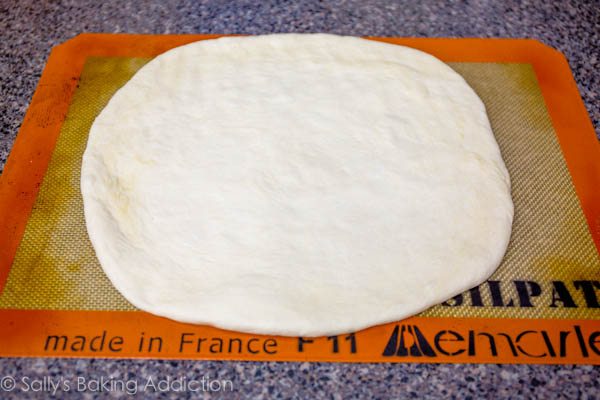
*You could also do this directly on your cornmeal lined pizza pan/baking sheet.
Flatten into a 12-inch round circle, flattening and stretching the dough. If using a pizza stone, place the dough directly on baker’s peels dusted with cornmeal.
11) Lift the edge of the dough up to create a lip around the edges. I simply pinched the edges up to create the rim like this. To prevent the filling from making your pizza crust soggy, brush the top lightly with olive oil. Using your fingers, push dents into the surface of the dough to prevent bubbling. Let rest for 15 minutes before topping.
12) Transfer to your pizza pan, baking sheet, or pizza stone. Be gentle. Top with your favorite toppings and bake for 12-15 minutes. For the last minute, I move the oven rack to the top rack to really brown the edges. That’s optional.

13) Slice hot pizza and serve immediately. Store leftover pizza covered tightly in the refrigerator and reheat as you prefer. Baked pizza slices may be frozen up to 1 month.
Fuente: sallysbakingaddiction.com
Once all of the ingredients are mixed, knead for 7 minutes by hand or with your dough hook on low-medium speed. If your dough is too wet, add up to 1/4 cup more flour. After kneading, your dough should be smooth and elastic. Poke it with your finger - if it slowly bounces back, your dough is ready to rise. If not, keep kneading.
Shape the dough into a ball and place in a large mixing bowl that has been coated lightly with olive oil. Turn it over to coat all sides. Cover tightly with plastic wrap and allow to rise in a warm environment (about 75F-80F).
For the warm environment, I heat up my oven to 200F. Then, I turn the oven off and keep the door slightly ajar (I opened it wide for this picture). This will be a warm environment for your dough to rise. After about 30 minutes, I close the oven door to trap warmish air inside with the rising dough.
Depending on your type of yeast, your dough will have doubled in size in about 1 - 2 hours. I use Red Star Platinum and my dough took 1 hour, 20 minutes.
Punch the dough down to release the air.
Divide the dough into two. Roll each half into a ball and let rest in two separate bowls lightly covered for 15 minutes. You may freeze one of the dough balls at this point to use at a later time. Please read above in the post for freezing instructions.
Preheat oven to 475F degrees. Allow to heat for at least 30 full minutes. Every inch of your oven needs to be very, very hot. Grease and dust 2 baking sheets with nonstick spray or with olive oil. Sprinkle with cornmeal (preferred for flavor and texture) or flour (not preferred). Please read above in the post for why cornmeal is preferred.
Prepare your favorite toppings. May I suggest my recipe for a simple extra cheese pizza?
After 15 minutes, flatten each ball of dough 1 at a time on a lightly floured surface or on a silicone baking mat. You could also do this directly on your cornmeal lined pizza pan. Flatten into a 12-inch round circle, flattening and stretching the dough. If using a pizza stone, place the dough directly on baker's peels dusted with cornmeal.
Lift the edge of the dough up to create a lip around the edges. I simply pinched the edges up to create the rim like this. To prevent the filling from making your pizza crust soggy, brush the top lightly with olive oil. Using your fingers, push dents into the surface of the dough to prevent bubbling. Let rest for 15 minutes before topping.
Top with your favorite toppings and bake for 12-15 minutes. For the last minute, I move the oven rack to the top rack to really brown the edges. That's optional.
Slice hot pizza and serve immediately. Store leftover pizza covered tightly in the refrigerator and reheat as you prefer. Baked pizza slices may be frozen up to 1 month.
Additional Notes:
*You may also substitute active dry yeast on an equal basis for the instant yeast. Expect an approximately 50% slower rise time.
© SALLY’S BAKING ADDICTION. All images & content are copyright protected. Please do not use my images without prior permission. If you want to republish this recipe, please re-write the recipe in your own words, or link back to this post for the recipe.
1) In a large mixing bowl or the bowl of your stand mixer fitted with a hook attachment, combine the 1 packet of yeast and 1 and 1/3 cups warm water. Stir it around and let sit for 5 minutes or until the yeast is foamy and dissolved. This is called “proofing” the yeast. If the yeast doesn’t dissolve, your yeast is dead. Start again with active yeast. Add 3 and 1/2 cups flour, 2 Tablespoons olive oil, 3/4 teaspoon salt, and 1 Tablespoon sugar. Mix by hand or with the dough hook on low speed for 1 minute:
2) Once all of the ingredients are mixed, knead for 7 minutes by hand or with your dough hook on low-medium speed. If your dough is too wet, add up to 1/4 cup more flour. After kneading, your dough should be smooth and elastic. Poke it with your finger – if it slowly bounces back, your dough is ready to rise. If not, keep kneading.
Here is my dough halfway through mixing with the dough hook (after about 3 minutes).
Here is my dough when it is ready to rise, after 7 minutes:
3) Shape the dough into a ball and place in a large mixing bowl that has been coated lightly with olive oil. Turn it over to coat all sides. Cover tightly with plastic wrap and allow to rise in a warm environment (about 75F-80F).
4) For the warm environment, I heat up my oven to 200F. Then, I turn the oven off and keep the door slightly ajar (I opened it wide for this picture). This will be a warm environment for your dough to rise. After about 30 minutes, I close the oven door to trap warmish air inside with the rising dough.
5) Depending on your type of yeast, your dough will have doubled in size in about 1 – 2 hours. I use Red Star Platinum and my dough took 1 hour, 20 minutes.
6) Punch the dough down to release the air. Watch it deflate!
7) Divide the dough into two. Roll each half into a ball and let rest in two separate bowls lightly covered for 15 minutes. You may freeze one of the dough balls at this point to use at a later time. Please read above in the post for freezing instructions.
8) Preheat oven to 475F degrees. Allow to heat for at least 30 full minutes. Every inch of your oven needs to be very, very hot. Grease and dust 2 baking sheets or pizza pans with nonstick spray or with olive oil. Sprinkle with cornmeal (preferred for flavor and texture) or flour (not preferred). Please read above in the post for why cornmeal is preferred.
9) Prepare your favorite toppings. May I suggest my recipe for a simple extra cheese pizza? 🙂 Use homemade tomato sauce if you prefer.
10) After 15 minutes, flatten each ball of dough 1 at a time on a lightly floured surface or on a silicone baking mat.
*You could also do this directly on your cornmeal lined pizza pan/baking sheet.
Flatten into a 12-inch round circle, flattening and stretching the dough. If using a pizza stone, place the dough directly on baker’s peels dusted with cornmeal.
11) Lift the edge of the dough up to create a lip around the edges. I simply pinched the edges up to create the rim like this. To prevent the filling from making your pizza crust soggy, brush the top lightly with olive oil. Using your fingers, push dents into the surface of the dough to prevent bubbling. Let rest for 15 minutes before topping.
12) Transfer to your pizza pan, baking sheet, or pizza stone. Be gentle. Top with your favorite toppings and bake for 12-15 minutes. For the last minute, I move the oven rack to the top rack to really brown the edges. That’s optional.
13) Slice hot pizza and serve immediately. Store leftover pizza covered tightly in the refrigerator and reheat as you prefer. Baked pizza slices may be frozen up to 1 month.
Fuente: sallysbakingaddiction.com
domingo, 4 de septiembre de 2016
http://www.marthastewart.com/1038419/time-overripe-bake-bananas?utm_source=mslo-newsletter&utm_medium=email&utm_campaign=marthastewartliving_083016&did=62452
http://www.marthastewart.com/275123/quick-breads?utm_source=mslo-newsletter&utm_medium=email&utm_campaign=marthastewartliving_083016&did=62452
http://www.marthastewart.com/1504014/bakery-worthy-breads-you-can-make-home?utm_source=mslo-newsletter&utm_medium=email&utm_campaign=marthastewartliving_083016&did=62452#846715
http://www.marthastewart.com/354909/skillet-breads
https://es.tastemade.com/videos/scons-de-queso-y-panceta
jueves, 1 de septiembre de 2016
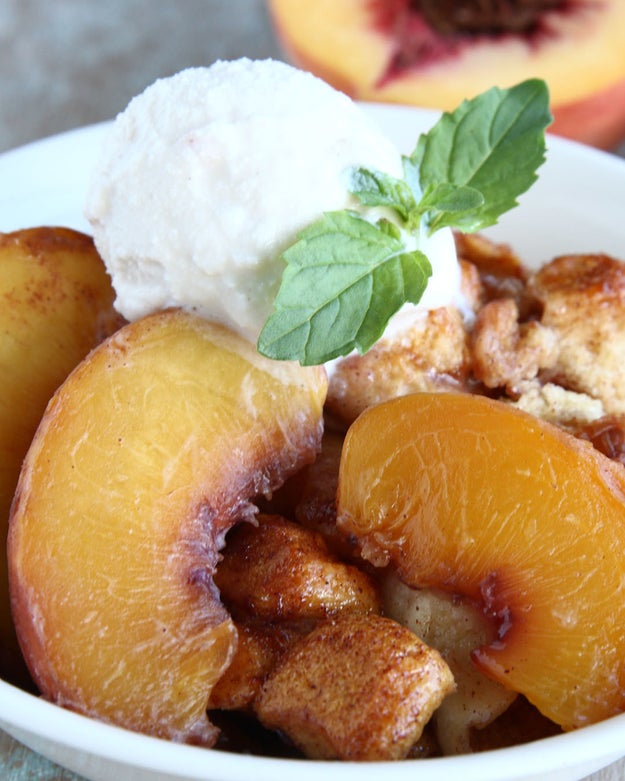
{Peach cobbler cake}
Porciones: 4-6
En el mercado
1 can of cinnamon rolls
3 peaches
1½ teaspoons cornstarch
1 teaspoon cinnamon
- Garnish
Vanilla ice cream
Mint leaves
En la cocina
1) Preheat oven to 350°F/175°C.
2) Separate cinnamon rolls and cut into 1-inch pieces. Place the cinnamon roll pieces into a medium bowl and set aside.
3) Cut each peach into 8-12 wedges. Place in a medium bowl, add cornstarch and cinnamon, and mix to coat each peach.
4) In a baking dish, place half of the cinnamon rolls down on the bottom. Then add half of the peaches on top. Repeat and add the rest of the ingredients.
5) Drizzle the icing packet from the cinnamon roll tube over the cobbler and bake for 30 minutes.
6) Serve warm with a scoop of vanilla ice cream.
Fuente: www.buzzfeed.com
Suscribirse a:
Entradas (Atom)