En el mercado
All pizza doughs recipes are different, but they typically all have the same ingredients: flour, yeast, water, salt, oil, and some may have sugar. Here is the breakdown of what I use in my recipe.
Yeast. I use Red Star Platinum yeast. I have the best results in my breads when I use their platinum line. Though I am being compensated for sponsoring Red Star Yeast, please know that I’ve been an avid user ever since I began to bake with yeast. Their Platinum line is fantastic; its careful formula strengthens your dough and makes making working with yeast simple. I use only enough yeast to get the job done; I don’t like pizza dough to taste “yeasty.” (Technical terms here, of course.) 1 standard packet (2 and 1/4 teaspoons) is what you need for my pizza crust recipe.
Water. I tested this recipe with many different amounts of water over the past few weeks. I find that 1 and 1/3 cups is the perfect number. Please use lukewarm water (105F – 115F). Anything over 120F will kill your yeast.
Flour. Please use unbleached all-purpose white flour in this recipe. Bleaching the flour strips away some of the protein, which will affect how much water your flour absorbs in this recipe. You may use bread flour instead, but you’ll have to increase the water by a couple Tablespoons since bread flour contains more protein than all-purpose. I do not know how to make this pizza crust gluten free. For the best results, just stick to the recipe as written.
Oil. Extra virgin gives this pizza crust the best taste. You’ll also line your bowl with olive oil as the dough rises and brush your dough with olive oil before layering on the toppings. This prevents the crust from getting soggy from the toppings.
Salt. Salt gives my pizza crust a little flavor. Pizza dough without salt tastes bland regardless of the toppings. I tested with two different amounts and 3/4 teaspoon is perfect.
Sugar. I add a touch of sugar to my pizza dough recipe. Sugar increases the yeast’s activity, while salt can control it. Furthermore, a slight touch of sugar will tenderize your dough, especially when paired with the olive oil.
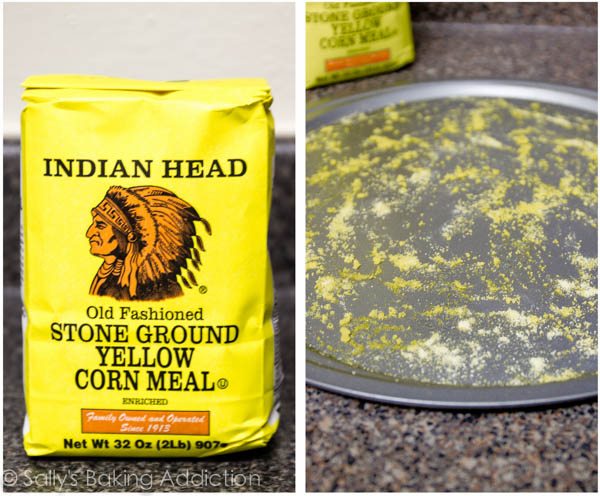
Cornmeal. Not all pizza dough recipes use cornmeal to dust the pan, but I prefer it. The main reason you sprinkle cornmeal onto the bottom of your pizza pan is so that the pizza won’t stick to the bottom of the pan. It gives the pizza crust a little flavor and crispy texture as well. You could just use regular flour to dust the pan, but you’ll lose the flavor cornmeal provides.
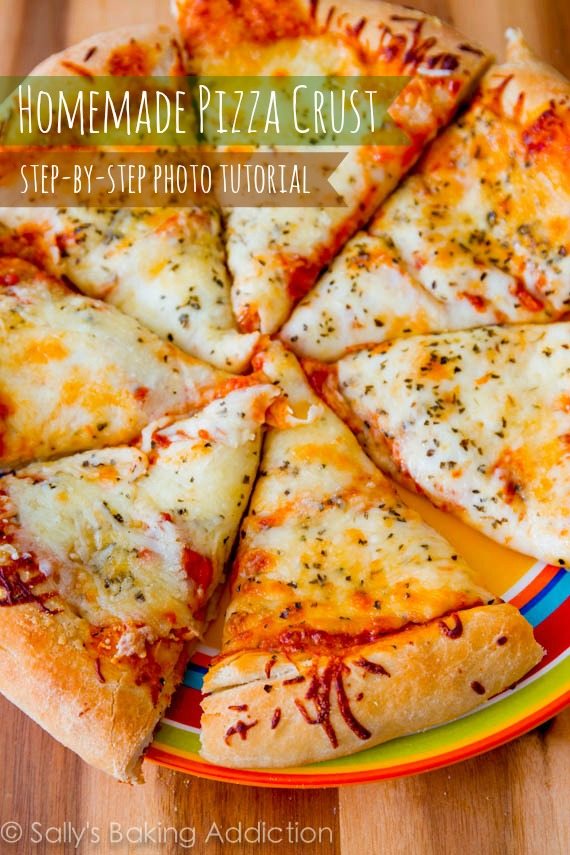
How to make Homemade Pizza Crust. A step-by-step photo tutorial by sallysbakingaddiction.com
Freezing Instructions
It’s important to know that this recipe is enough to make two 12-inch pizzas. If you do not need two pizzas, here are the freezing instructions:
After the pizza dough has risen and you divide the dough in half to form into two pizzas (step 7), you may freeze one of the balls of dough to make a pizza at a later time. Or you may simply freeze both balls of dough, separately. Lightly spray all sides of the dough ball(s) with nonstick spray or lightly coat all sides with olive oil. Place the dough ball(s) into individual zipped-top bag(s) and seal tightly, squeezing out all the air. Freeze for up to 3 months.
Thawing Instructions
Put your frozen pizza dough ball(s) in the fridge overnight or for about 12 hours to thaw. When ready to make the pizza(s), remove the dough from the refrigerator and set out on the counter to rest for 30 minutes and come to room temperature. Continue with step 8.
Do NOT feel overwhelmed. I made sure to break everything down very easily, so a lot of the text in this recipe is me being as thorough as possible. Be sure to use the photos below this recipe as a visual guide.
Sally’s tip: Be gentle with your dough at ALL times. Let your dough rest as I instruct in the recipe below. It’s fragile and should be handled with care.
Porciones: 2 pizzas de 30,5 cm
Tiempo de preparación: 2 h y 15 m
Tiempo total: 2h y 30 m
Follow these easy instructions for creating a thick & chewy pizza crust at home. I do not know how to make this pizza crust gluten free. For the best results, just stick to the recipe as written.
En el mercado
2 y 1/4 cucharitas de té de Red Star Platinum yeast (1 standard packet, 7g)*
1 y 1/3 tazas (320ml) de agua tibia (105-115F degrees)
3 y 1/2 tazas (440g) unbleached all-purpose flour, plus more as needed
2 cucharadas (30ml) de aceite de oliva
3/4 cucharitas de té de sal
1 cucharadas (13g) de azúcar granulada
Harina de maíz, para empolvorear la pizzera
En la cocina
1) En un bowl grande (or the bowl of your stand mixer fitted with a hook attachment), combinar la levadura con el agua tibia. Mezclar y dejar reposar durante 5 minutos, o hasts que la levadura esté espumosa y disuelta. Esto se llama "proofing" la levadura. Si la levadura no se disuelve, la levadura está "muerta". Comienza de nuevo con levadura activa.
1) En un bowl grande (or the bowl of your stand mixer fitted with a hook attachment), combinar la levadura con el agua tibia. Mezclar y dejar reposar durante 5 minutos, o hasts que la levadura esté espumosa y disuelta. Esto se llama "proofing" la levadura. Si la levadura no se disuelve, la levadura está "muerta". Comienza de nuevo con levadura activa.
2) nd warm water. Stir it around and let sit for 5 minutes of until the yeast is foamy and dissolved. This is called "proofing" the yeast. If the yeast doesn't dissolve, your yeast is dead. Start again with active yeast. Add flour, olive oil, salt, and sugar. Mix by hand or with the dough hook on low speed for 1 minute.
Once all of the ingredients are mixed, knead for 7 minutes by hand or with your dough hook on low-medium speed. If your dough is too wet, add up to 1/4 cup more flour. After kneading, your dough should be smooth and elastic. Poke it with your finger - if it slowly bounces back, your dough is ready to rise. If not, keep kneading.
Shape the dough into a ball and place in a large mixing bowl that has been coated lightly with olive oil. Turn it over to coat all sides. Cover tightly with plastic wrap and allow to rise in a warm environment (about 75F-80F).
For the warm environment, I heat up my oven to 200F. Then, I turn the oven off and keep the door slightly ajar (I opened it wide for this picture). This will be a warm environment for your dough to rise. After about 30 minutes, I close the oven door to trap warmish air inside with the rising dough.
Depending on your type of yeast, your dough will have doubled in size in about 1 - 2 hours. I use Red Star Platinum and my dough took 1 hour, 20 minutes.
Punch the dough down to release the air.
Divide the dough into two. Roll each half into a ball and let rest in two separate bowls lightly covered for 15 minutes. You may freeze one of the dough balls at this point to use at a later time. Please read above in the post for freezing instructions.
Preheat oven to 475F degrees. Allow to heat for at least 30 full minutes. Every inch of your oven needs to be very, very hot. Grease and dust 2 baking sheets with nonstick spray or with olive oil. Sprinkle with cornmeal (preferred for flavor and texture) or flour (not preferred). Please read above in the post for why cornmeal is preferred.
Prepare your favorite toppings. May I suggest my recipe for a simple extra cheese pizza?
After 15 minutes, flatten each ball of dough 1 at a time on a lightly floured surface or on a silicone baking mat. You could also do this directly on your cornmeal lined pizza pan. Flatten into a 12-inch round circle, flattening and stretching the dough. If using a pizza stone, place the dough directly on baker's peels dusted with cornmeal.
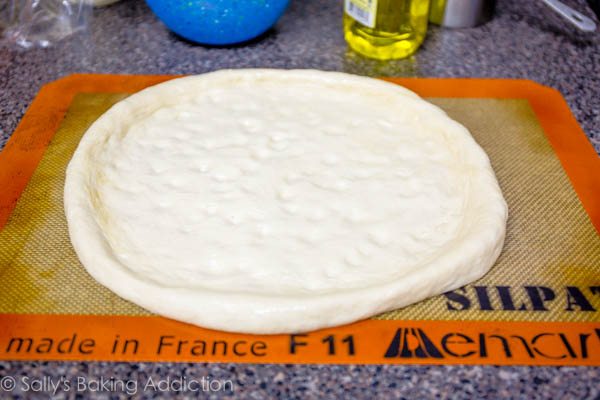
Lift the edge of the dough up to create a lip around the edges. I simply pinched the edges up to create the rim like this. To prevent the filling from making your pizza crust soggy, brush the top lightly with olive oil. Using your fingers, push dents into the surface of the dough to prevent bubbling. Let rest for 15 minutes before topping.
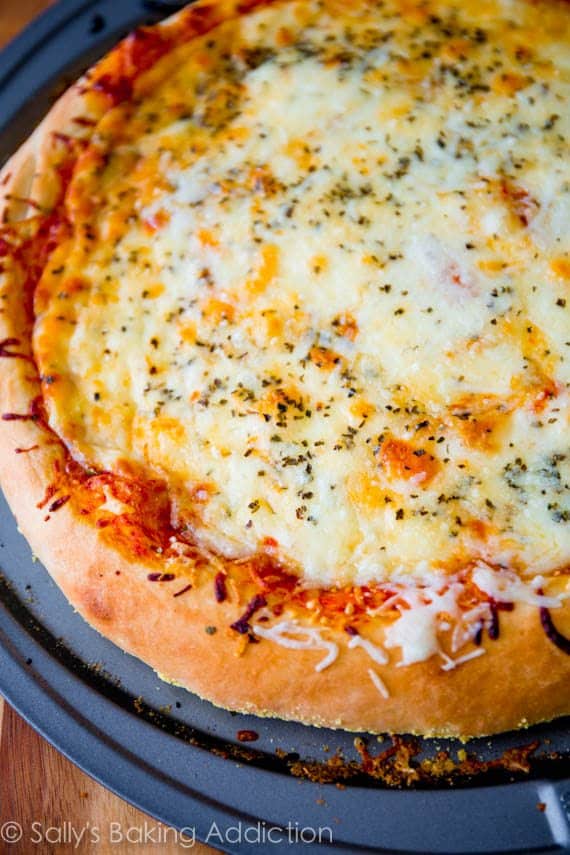
Top with your favorite toppings and bake for 12-15 minutes. For the last minute, I move the oven rack to the top rack to really brown the edges. That's optional.
Slice hot pizza and serve immediately. Store leftover pizza covered tightly in the refrigerator and reheat as you prefer. Baked pizza slices may be frozen up to 1 month.
Additional Notes:
*You may also substitute active dry yeast on an equal basis for the instant yeast. Expect an approximately 50% slower rise time.
© SALLY’S BAKING ADDICTION. All images & content are copyright protected. Please do not use my images without prior permission. If you want to republish this recipe, please re-write the recipe in your own words, or link back to this post for the recipe.
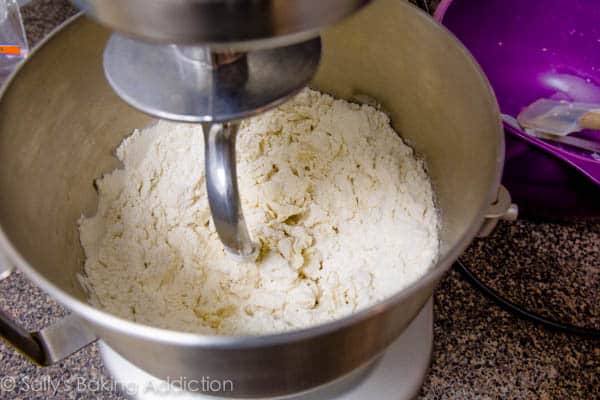
1) In a large mixing bowl or the bowl of your stand mixer fitted with a hook attachment, combine the 1 packet of yeast and 1 and 1/3 cups warm water. Stir it around and let sit for 5 minutes or until the yeast is foamy and dissolved. This is called “proofing” the yeast. If the yeast doesn’t dissolve, your yeast is dead. Start again with active yeast. Add 3 and 1/2 cups flour, 2 Tablespoons olive oil, 3/4 teaspoon salt, and 1 Tablespoon sugar. Mix by hand or with the dough hook on low speed for 1 minute:
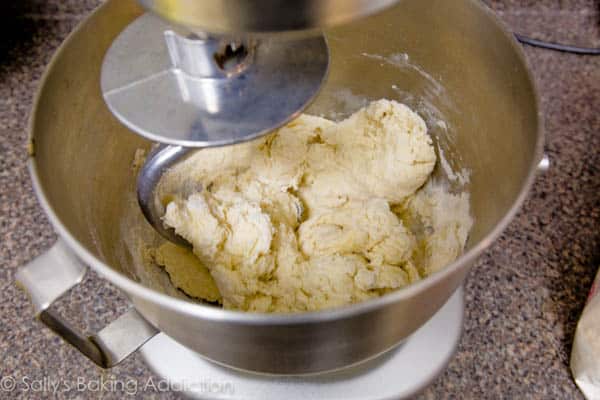
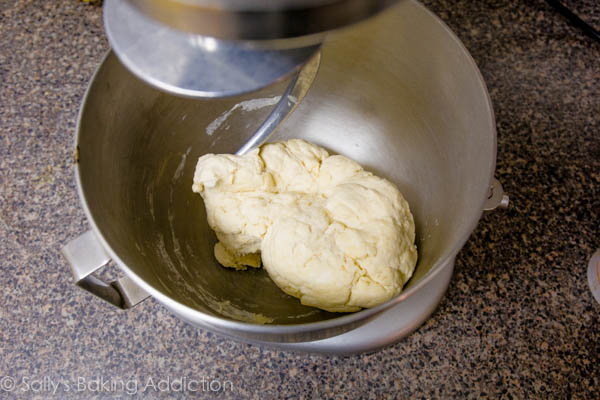
2) Once all of the ingredients are mixed, knead for 7 minutes by hand or with your dough hook on low-medium speed. If your dough is too wet, add up to 1/4 cup more flour. After kneading, your dough should be smooth and elastic. Poke it with your finger – if it slowly bounces back, your dough is ready to rise. If not, keep kneading.
Here is my dough halfway through mixing with the dough hook (after about 3 minutes).
Here is my dough when it is ready to rise, after 7 minutes:
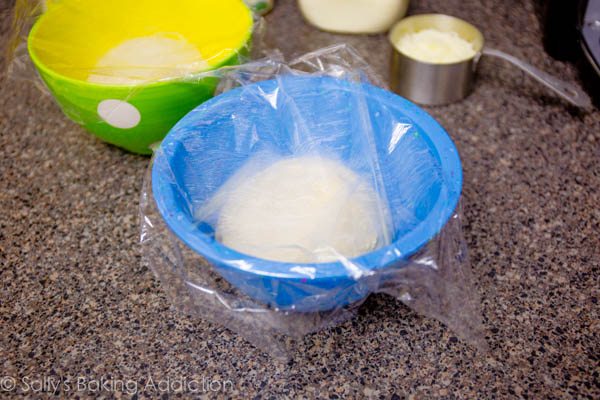
3) Shape the dough into a ball and place in a large mixing bowl that has been coated lightly with olive oil. Turn it over to coat all sides. Cover tightly with plastic wrap and allow to rise in a warm environment (about 75F-80F).

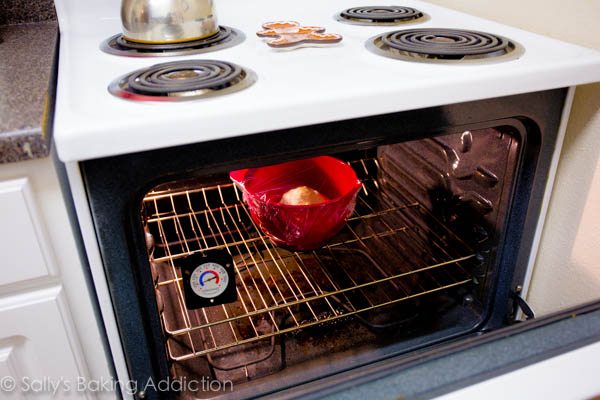
4) For the warm environment, I heat up my oven to 200F. Then, I turn the oven off and keep the door slightly ajar (I opened it wide for this picture). This will be a warm environment for your dough to rise. After about 30 minutes, I close the oven door to trap warmish air inside with the rising dough.
5) Depending on your type of yeast, your dough will have doubled in size in about 1 – 2 hours. I use Red Star Platinum and my dough took 1 hour, 20 minutes.
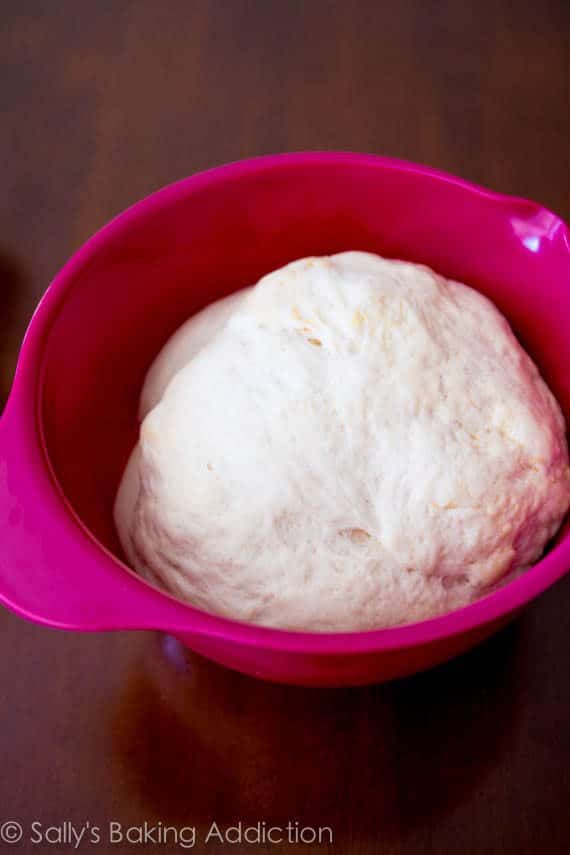
6) Punch the dough down to release the air. Watch it deflate!
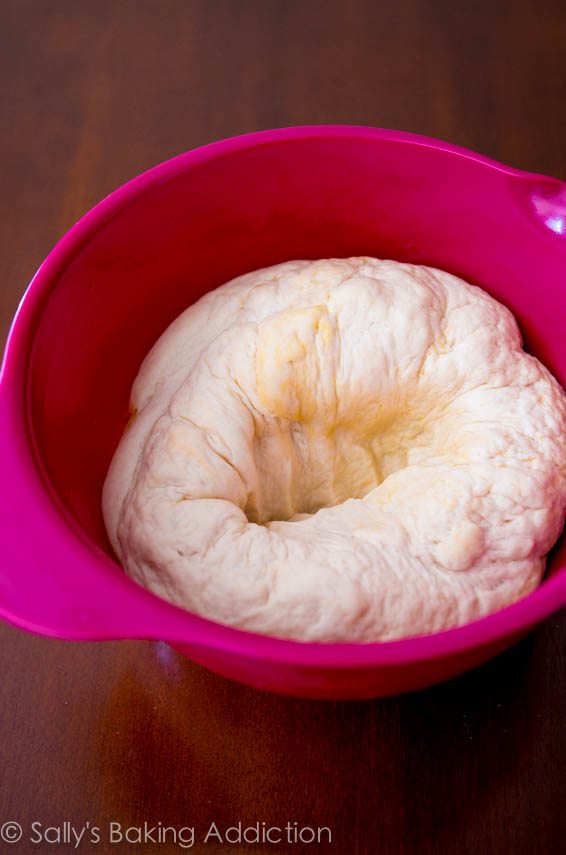
7) Divide the dough into two. Roll each half into a ball and let rest in two separate bowls lightly covered for 15 minutes. You may freeze one of the dough balls at this point to use at a later time. Please read above in the post for freezing instructions.
8) Preheat oven to 475F degrees. Allow to heat for at least 30 full minutes. Every inch of your oven needs to be very, very hot. Grease and dust 2 baking sheets or pizza pans with nonstick spray or with olive oil. Sprinkle with cornmeal (preferred for flavor and texture) or flour (not preferred). Please read above in the post for why cornmeal is preferred.
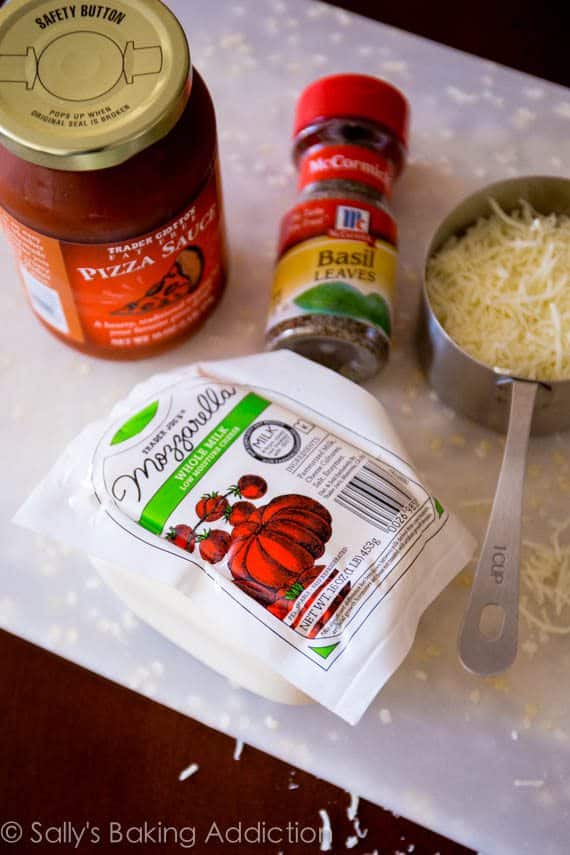
9) Prepare your favorite toppings. May I suggest my recipe for a simple extra cheese pizza? 🙂 Use homemade tomato sauce if you prefer.
10) After 15 minutes, flatten each ball of dough 1 at a time on a lightly floured surface or on a silicone baking mat.
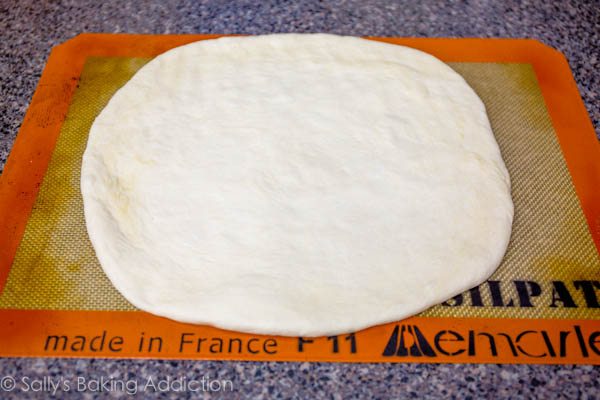
*You could also do this directly on your cornmeal lined pizza pan/baking sheet.
Flatten into a 12-inch round circle, flattening and stretching the dough. If using a pizza stone, place the dough directly on baker’s peels dusted with cornmeal.
11) Lift the edge of the dough up to create a lip around the edges. I simply pinched the edges up to create the rim like this. To prevent the filling from making your pizza crust soggy, brush the top lightly with olive oil. Using your fingers, push dents into the surface of the dough to prevent bubbling. Let rest for 15 minutes before topping.
12) Transfer to your pizza pan, baking sheet, or pizza stone. Be gentle. Top with your favorite toppings and bake for 12-15 minutes. For the last minute, I move the oven rack to the top rack to really brown the edges. That’s optional.

13) Slice hot pizza and serve immediately. Store leftover pizza covered tightly in the refrigerator and reheat as you prefer. Baked pizza slices may be frozen up to 1 month.
Fuente: sallysbakingaddiction.com
Once all of the ingredients are mixed, knead for 7 minutes by hand or with your dough hook on low-medium speed. If your dough is too wet, add up to 1/4 cup more flour. After kneading, your dough should be smooth and elastic. Poke it with your finger - if it slowly bounces back, your dough is ready to rise. If not, keep kneading.
Shape the dough into a ball and place in a large mixing bowl that has been coated lightly with olive oil. Turn it over to coat all sides. Cover tightly with plastic wrap and allow to rise in a warm environment (about 75F-80F).
For the warm environment, I heat up my oven to 200F. Then, I turn the oven off and keep the door slightly ajar (I opened it wide for this picture). This will be a warm environment for your dough to rise. After about 30 minutes, I close the oven door to trap warmish air inside with the rising dough.
Depending on your type of yeast, your dough will have doubled in size in about 1 - 2 hours. I use Red Star Platinum and my dough took 1 hour, 20 minutes.
Punch the dough down to release the air.
Divide the dough into two. Roll each half into a ball and let rest in two separate bowls lightly covered for 15 minutes. You may freeze one of the dough balls at this point to use at a later time. Please read above in the post for freezing instructions.
Preheat oven to 475F degrees. Allow to heat for at least 30 full minutes. Every inch of your oven needs to be very, very hot. Grease and dust 2 baking sheets with nonstick spray or with olive oil. Sprinkle with cornmeal (preferred for flavor and texture) or flour (not preferred). Please read above in the post for why cornmeal is preferred.
Prepare your favorite toppings. May I suggest my recipe for a simple extra cheese pizza?
After 15 minutes, flatten each ball of dough 1 at a time on a lightly floured surface or on a silicone baking mat. You could also do this directly on your cornmeal lined pizza pan. Flatten into a 12-inch round circle, flattening and stretching the dough. If using a pizza stone, place the dough directly on baker's peels dusted with cornmeal.
Lift the edge of the dough up to create a lip around the edges. I simply pinched the edges up to create the rim like this. To prevent the filling from making your pizza crust soggy, brush the top lightly with olive oil. Using your fingers, push dents into the surface of the dough to prevent bubbling. Let rest for 15 minutes before topping.
Top with your favorite toppings and bake for 12-15 minutes. For the last minute, I move the oven rack to the top rack to really brown the edges. That's optional.
Slice hot pizza and serve immediately. Store leftover pizza covered tightly in the refrigerator and reheat as you prefer. Baked pizza slices may be frozen up to 1 month.
Additional Notes:
*You may also substitute active dry yeast on an equal basis for the instant yeast. Expect an approximately 50% slower rise time.
© SALLY’S BAKING ADDICTION. All images & content are copyright protected. Please do not use my images without prior permission. If you want to republish this recipe, please re-write the recipe in your own words, or link back to this post for the recipe.
1) In a large mixing bowl or the bowl of your stand mixer fitted with a hook attachment, combine the 1 packet of yeast and 1 and 1/3 cups warm water. Stir it around and let sit for 5 minutes or until the yeast is foamy and dissolved. This is called “proofing” the yeast. If the yeast doesn’t dissolve, your yeast is dead. Start again with active yeast. Add 3 and 1/2 cups flour, 2 Tablespoons olive oil, 3/4 teaspoon salt, and 1 Tablespoon sugar. Mix by hand or with the dough hook on low speed for 1 minute:
2) Once all of the ingredients are mixed, knead for 7 minutes by hand or with your dough hook on low-medium speed. If your dough is too wet, add up to 1/4 cup more flour. After kneading, your dough should be smooth and elastic. Poke it with your finger – if it slowly bounces back, your dough is ready to rise. If not, keep kneading.
Here is my dough halfway through mixing with the dough hook (after about 3 minutes).
Here is my dough when it is ready to rise, after 7 minutes:
3) Shape the dough into a ball and place in a large mixing bowl that has been coated lightly with olive oil. Turn it over to coat all sides. Cover tightly with plastic wrap and allow to rise in a warm environment (about 75F-80F).
4) For the warm environment, I heat up my oven to 200F. Then, I turn the oven off and keep the door slightly ajar (I opened it wide for this picture). This will be a warm environment for your dough to rise. After about 30 minutes, I close the oven door to trap warmish air inside with the rising dough.
5) Depending on your type of yeast, your dough will have doubled in size in about 1 – 2 hours. I use Red Star Platinum and my dough took 1 hour, 20 minutes.
6) Punch the dough down to release the air. Watch it deflate!
7) Divide the dough into two. Roll each half into a ball and let rest in two separate bowls lightly covered for 15 minutes. You may freeze one of the dough balls at this point to use at a later time. Please read above in the post for freezing instructions.
8) Preheat oven to 475F degrees. Allow to heat for at least 30 full minutes. Every inch of your oven needs to be very, very hot. Grease and dust 2 baking sheets or pizza pans with nonstick spray or with olive oil. Sprinkle with cornmeal (preferred for flavor and texture) or flour (not preferred). Please read above in the post for why cornmeal is preferred.
9) Prepare your favorite toppings. May I suggest my recipe for a simple extra cheese pizza? 🙂 Use homemade tomato sauce if you prefer.
10) After 15 minutes, flatten each ball of dough 1 at a time on a lightly floured surface or on a silicone baking mat.
*You could also do this directly on your cornmeal lined pizza pan/baking sheet.
Flatten into a 12-inch round circle, flattening and stretching the dough. If using a pizza stone, place the dough directly on baker’s peels dusted with cornmeal.
11) Lift the edge of the dough up to create a lip around the edges. I simply pinched the edges up to create the rim like this. To prevent the filling from making your pizza crust soggy, brush the top lightly with olive oil. Using your fingers, push dents into the surface of the dough to prevent bubbling. Let rest for 15 minutes before topping.
12) Transfer to your pizza pan, baking sheet, or pizza stone. Be gentle. Top with your favorite toppings and bake for 12-15 minutes. For the last minute, I move the oven rack to the top rack to really brown the edges. That’s optional.
13) Slice hot pizza and serve immediately. Store leftover pizza covered tightly in the refrigerator and reheat as you prefer. Baked pizza slices may be frozen up to 1 month.
Fuente: sallysbakingaddiction.com

No hay comentarios:
Publicar un comentario