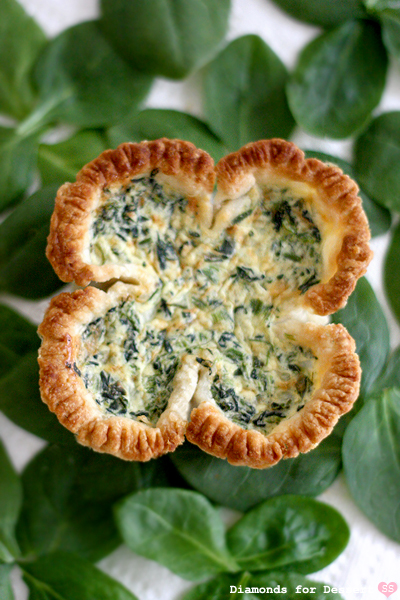
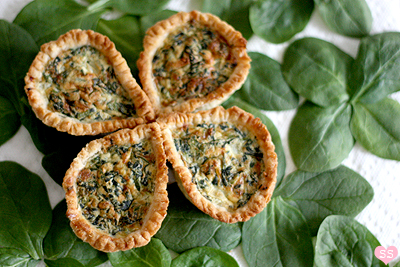
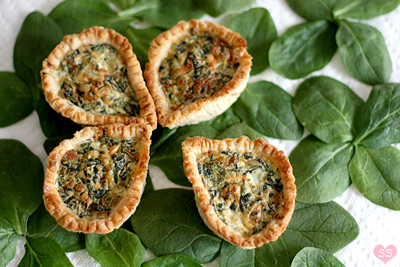
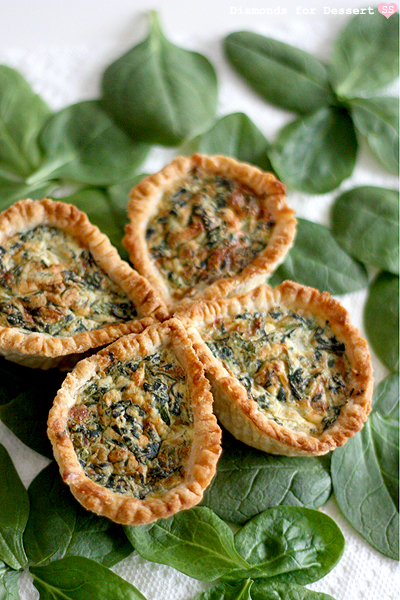
I didn't want to buy a clover shaped pan, since I knew it'd get very little use and take up a lot of space. Instead, I did some brainstorming and came up with two different ways to make 4-leaf clover shaped quiches. Both involve disposable aluminum pans, one a muffin pan and one a pot pie dish. So pick and choose depending on which method you like better. The great thing about this quiche recipe is that it's pretty adaptable in terms of ingredients. Overall, these would make a great treat at any springtime party.
Lucky Spinach Quiche
adapted from Smitten Kitchen 10 oz frozen spinach, thawed and drained
3 eggs
1/3 cup half-and-half (or milk or cream)
1/2 cup grated gruyere or cheddar
1/4 cup grated parmesan
3 oz. cream cheese, room temperature
1/2 cup diced onion (white, red, or green onions)
1/4 tsp salt
1/4 tsp pepper
1/2 recipe pâte brisée (recipe below)
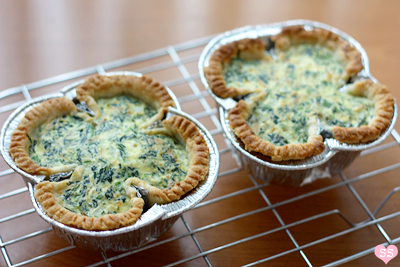
Preheat oven to 425ºF. Mix the cream cheese with the eggs, one at a time. Mix in the half-and-half, salt, and pepper. Then add the rest of the ingredients: spinach, gruyere, parmesan, and onions. Mix. Shape the pâte brisée in either of the two methods described below. After the shape crusts are filled, place the aluminum tins on a baking sheet and bake the quiches for about 20 minutes. Cool for a few minutes.
Carefully remove the quiches from the aluminum tins, line the baking sheet with parchment paper, and place the quiches on the lined sheet. Place the quiches back in the oven for 5-10 minutes until the crust sides crisp up a bit. Let cool for 10 minutes, then serve.
Makes 3 quiches or 12 mini quiches
Pâte Brisée
adapted from Martha Stewart2 1/2 cups flour
1 cup (2 sticks) butter, chilled and cut into small pieces
1 tsp salt
1/4-1/2 cup ice water
Mix the flour with the salt. Cut the butter into the flour with a pastry cutter or your fingers until it resembles coarse meal. Add the ice water, a little at a time, while gently mixing until the dough sticks together. Split the dough in two. Place each half on a piece of plastic wrap and flatten each into a disc. Wrap the dough in the plastic wrap and refrigerate at least 1 hour, until ready to use.
Makes 2 9-inch pie crusts
Shaping the Crusts
Method 1 (3 quiches)3 aluminum pot pie pans
1) Take a pair of scissors and cut at four equally spaced points on the edge of the pot pie tin. One snip on the right, one on the left, one at the top, and one at the bottom.
2) Start pushing the cut edges towards one another. Crease the pan side, right under the cut, so that the crease points inwards. Be careful because the edges are sharp.
3) Start rounding out the rest of the pan edge, curving the pan edge.
4) Repeat with the rest of the pan edges.
5) This is what the pan should look like when you're done. Now, lightly spray the pan with nonstick spray.
6) Roll out the dough between two sheets of plastic wrap. Split it into 3 equal squares and place each square in a shaped pan. Have the extra dough stick out inwards at the four points where the pie pan edges overlap.
7) Take some foil and fold 12 little thick rectangles. Spray the rectangles with nonstick spray. Place each rectangle between the extra dough flaps on each crust. Press the dough into the bottom of each pan and around the foil rectangles. Take a fork and lightly prick the interior of each crust. Then use the fork tines to press into the top edge of the crusts.
8) Refrigerate the crusts for 10 minutes. Then, fill and bake.
Method 2 (12 mini quiches)
2 aluminum 6-muffin tins
1) To shape the muffin tins, from the long side, pull on center of the edge of each muffin cup to a point. Crease side of the cup to emphasize the point (each cup should now look like a raindrop/petal). Lightly spray the two muffin tins.
2) Roll out the pie crust dough between plastic wrap sheets and divide it into 12 squares. Place each dough square in a muffin cup. Press the dough into the muffin tins and trim off extra dough. Use a fork to lightly poke holes on the crust and use the fork tines to press along the top edge of each crust.
3) Refrigerate the lined trays for 10 minutes. Fill the crusts and bake.
Fuente: www.diamondsfordessert.com



No hay comentarios:
Publicar un comentario