viernes, 23 de diciembre de 2016

{Paté de lentejas by Juliana López May}


Porciones: 6 personas
Tiempo de preparación: 60 minutos

 En el mercado

500 g. de lentejas
Jugo de 1 limón
1 diente de ajo
Aceite de oliva
Perejil picado
Cilantro picado
Sal y pimienta
1 pote de yogur natural colado (para esto, dejarlo colgado dentro de un paño durante 4 horas)
Hojas de perejil
Ralladura de limón

En la cocina

1) Cocinar las lentejas y dejarlas pasarse un poco.
2) Procesarlas con el jugo de limón, el ajo, el perejil picado y el cilantro.
3) Colocar por arriba el yogur colado, la ralladura de limón, las hojas de perejil, el aceite de oliva, la sal y la pimienta.
4) Mezclar todo y servir.

Inspiraciónwww.revistaohlala.com

{Basic tomato sauce}


Yield: 6 cups
Prep Time: 15 minutes
Cook Time: 1 hour, 10 minutes

Ingredients

1/2 cup extra-virgin olive oil
1 small onion, chopped
2 cloves garlic, chopped
1 stalk celery, chopped
1 carrot, chopped
2 (32-ounce) cans crushed tomatoes
4 to 6 basil leaves
2 dried bay leaves
Sea salt and freshly ground black pepper
4 tablespoons unsalted butter, optional

Directions

1) In a large casserole pot, heat oil over medium-high heat. Add onion and garlic and saute until soft and translucent, about 2 minutes. Add celery and carrot and season with salt and pepper. Saute until all the vegetables are soft, about 5 minutes.
2) Add tomatoes, basil, and bay leaves and reduce the heat to low. Cover the pot and simmer for 1 hour or until thick.
3) Remove bay leaves and taste for seasoning. If sauce tastes too acidic, add unsalted butter, 1 tablespoon at a time, to round out the flavor.
4) Pour half the tomato sauce into the bowl of a food processor. Process until smooth. Continue with remaining tomato sauce.
5) If not using all the sauce, allow it to cool completely and then pour 1 to 2 cup portions into plastic freezer bags. Freeze for up to 6 months.

Inspiration: www.foodnetwork.com

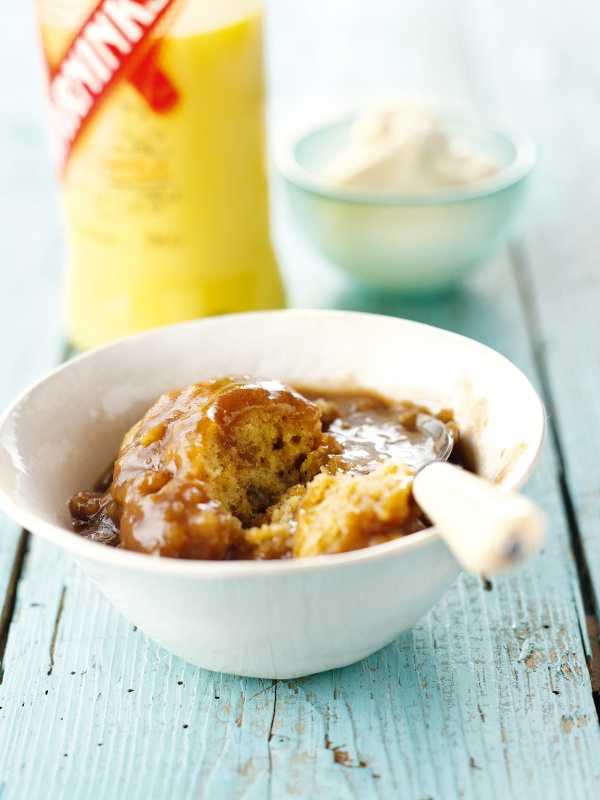
{Holiday Hot Cake With Eggnog Cream}


A warming, welcoming pud full of seasonal spice that can be thrown together in a matter of minutes. Truly a pudding to give thanks for.

Serves: 6-8

Ingredients

150 g. plain flour
300 g. light brown muscovado sugar
1 teaspoon baking powder
2 teaspoons ground ginger
2 teaspoons mixed spice
125 ml. full fat milk
60 ml. vegetable oil
1 large egg
6 teaspoons butter
500 ml. boiling water
350 ml. double cream
125 ml. advocaat

Method

Preheat oven to 220°C/gas mark 7/425ºF and place a baking sheet on the shelf. Put water on to boil.
Mix together the flour, 100g / ½ cup of the sugar, the baking powder, 1 teaspoon of the ground ginger, 1 teaspoon of the mixed spice, and the milk, oil and egg.
Put into a greased, round baking dish (23cm diameter x 6cm deep / 9 inch round x 2¼ inches deep).
In another bowl, mix together the remaining 200g / 1 cup of sugar with the remaining teaspoons each of mixed spice and ground ginger, and sprinkle over the batter in its baking dish. Dot the butter on top and pour the boiling water over the mixture. Trust me.
Put the dish on the baking sheet in the oven for 30 minutes. Let stand for 10 minutes before serving, and make sure you scoop out the sauce beneath the sponge in the dish.
Put the cream and advocaat into a bowl. Using an electric whisk, whip until thick but still soft. Serve with the Holiday Hotcake.

Inspirationwww.nigella.com

martes, 20 de diciembre de 2016

{Appetizers by Food Network}


Baby Bloomin’ Onions


Baked Mac-and-Cheese Bites


Quick Potato and Carrot Latkes


Crispy Potato Cake

{Carrot Cookies with Orange Buttercream Icing}


Total Time: 30 min
Prep: 20 min
Cook: 10 min
Yield:30 cookies
Level:Easy

Ingredients

- Orange Buttercream Frosting:

2 cups powdered sugar
1 cup unsalted butter, softened
2 teaspoons orange zest or the zest of 1 large orange
1/2 teaspoon vanilla extract

- Carrot Cookies:

1 cup unsalted butter, room temperature
1 cup sugar
2 large eggs
1 cup carrot baby food
2 teaspoons orange zest or the zest of 1 large orange
1 teaspoon vanilla extract
2 1/2 cups all-purpose flour
2 teaspoons baking powder
1/2 teaspoon salt
Orange Buttercream Icing, recipe follows

Cook's Note: Look for baby food primarily made with only 2 ingredients: carrots and water, such as Beech Nut brand.

Directions

- For the buttercream frosting

Cream together the sugar and butter in a small bowl until light and fluffy. Mix in the zest and vanilla extract.

- For the carrot cookies

Preheat the oven to 375 degrees F. Line 2 baking sheets with parchment paper.
Cream together the butter and sugar using an electric hand mixer or a stand mixer until light and fluffy, at least 5 minutes. Add in the eggs one at a time and beat for 2 minutes after each addition. Mix in the carrot baby food, orange zest and vanilla.
Whisk together the flour, baking powder and salt in a separate mixing bowl. Add the dry ingredients to the wet ingredients and beat together on low speed until incorporated, 1 minute.
Using a small 2-ounce ice cream scoop, drop by heaping scoops onto the prepared baking sheets, 15 cookies per sheet. Bake for 8 to10 minutes, rotating halfway through. Transfer to a cooling rack. Frost the cookies with the buttercream frosting while still warm.

Read more at: http://www.foodnetwork.com/recipes/carrot-cookies-with-orange-buttercream-icing.html?oc=linkback

{Vegetable Tarte Tatin}


Total Time: 1 hr 50 min
Prep: 40 min
Cook: 1 hr 10 min
Yield:8 servings
Level: Intermediate

Ingredients

2 medium Yukon gold potatoes, peeled and cut into 1/2-inch-thick rounds
2 medium sweet potatoes, peeled and cut into 1/2-inch-thick rounds
2 medium parsnips, peeled and cut into 1/2-inch-thick rounds
1 small onion, cut into 1/2-inch-thick rounds
4 cloves garlic, halved
3 tablespoons extra-virgin olive oil
Kosher salt and freshly ground pepper
3/4 cup sugar
1 tablespoon white wine vinegar
1 tablespoon small fresh sage leaves
1 tablespoon fresh oregano leaves
6 ounces mozzarella, grated (about 1 cup)
1 8 .5-ounce sheet frozen puff pastry, thawed
All-purpose flour, for dusting

Directions

Preheat the oven to 400 degrees F. Toss both kinds of potatoes, the parsnips, onion, garlic, olive oil, 1 teaspoon salt and 1/4teaspoon pepper in a bowl. Spread in a single layer on a baking sheet; bake until tender, about 45 minutes. Let cool slightly.
Meanwhile, mix 2 tablespoons water and the sugar in a skillet and bring to a boil over medium heat. Cook, swirling the pan, until amber, about 7 minutes. Remove from the heat and stir in the vinegar and 1/4teaspoon each salt and pepper. Pour the caramel into a 9-by-13-inch glass baking dish and spread with a rubber spatula. Sprinkle the sage and oregano on top.
Arrange the roasted potatoes and parsnips in a single snug layer on top of the caramel. Scatter the onion and garlic over the roasted vegetables; sprinkle evenly with the mozzarella.
Roll out the puff pastry on a lightly floured surface into a 9-by-13-inch rectangle. Pierce the pastry all over with a fork, then lay it on top of the mozzarella, folding the edges under to fit, if necessary. Bake 20 minutes, then reduce the oven temperature to 350 degrees F and continue baking until the dough is cooked through, 15 to 20 more minutes.
Let the tart cool 10 minutes in the baking dish, then carefully invert it onto a cutting board. Replace any vegetables that stick to the dish, if necessary.
Photograph by Anna Williams
Recipe courtesy of Food Network Magazine

Read more at: http://www.foodnetwork.com/recipes/food-network-kitchens/vegetable-tarte-tatin-recipe.html?oc=linkback

{Carrot cookies}

Tiempo total: 45 m
Tiempo de preparación: 30 m
Tiempo de cocción: 15 m
Porciones: 2 y 1/2 docena
Nivel: fácil

En el mercado

3/4 taza de harina común
1/2 cucharadita de té de polvo de hornear
1/2 cucharadita de té de sal
1 cucharadita de té de ralladura de cáscara de naranja
1/2 cucharadita de té de de canela molida
1/3 taza de aceite vegetal
1 huevo grande
1/3 taza de azúcar
1/3 taza de zanahorias cocidas y pisadas como puré
1/4 taza de pasas de uva

In the kitchen

1) Precalentar el horno en 350 grados.
2) Engrasar ligeramente en una fuente de horno.
3) En un bowl, batir la harina, el polvo de hornear, la sal, la ralladura de cáscara de naranja y la canela.
4) Mezclar el aceite, el huevo y el azúcar y agregar el puré de zanahorias y las pasas de uva.
5) Combinar los ingredientes húmedos con los secos.
6) Colocar cucharaditas de té al ras de la masa, en la fuente de horno.
7) Cocinar de 12 a 15 minutos o hasta que estén doradas.

Fuentewww.foodnetwork.com

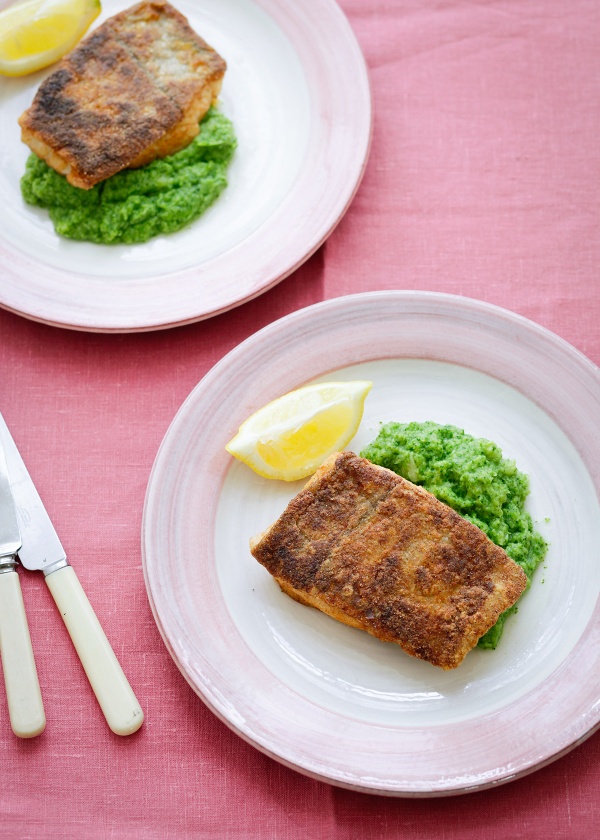
{Spiced and Fried Haddock With Broccoli Puree}


This recipe could hardly be easier, and requires no complication, nor any effort to keep it simple. Good fish, lightly dredged in spiced flour then flash-fried, is an old-fashioned pleasure, and one to be savoured. Here I use gluten-free flour in preference to regular plain flour to coat the fish. I had wanted the slight grittiness of rice flour, but had none in the house, and gluten-free flour (which I did have) contains rice flour and worked fabulously. Obviously, you can use plain flour if you wish. And while the verdiglorious accompaniment may look like old-time mushy peas, it is, in fact, broccoli, blitzed with a stick blender. I use frozen broccoli simply because I find that, cooked in this way, the taste is – counterintuitively – fresher and needs no more added to it than a little salt and pepper to taste, along with the mildest, yet emphatically creamy, hit of coconut. If you cringe at the idea of coconuttiness, however delicate, then use butter or a really good extra-virgin olive oil instead.

Serves: 2

In the market

- For the broccoli puree

500 g. frozen broccoli florets
2 tablespoons cold-pressed coconut oil (or butter or extra-virgin olive oil)
salt (to taste)
pepper (to taste)

- For the spiced haddock

3 tablespoons gluten-free or plain flour
1 teaspoon ground ginger
1 teaspoon paprika (pimentón)
1 teaspoon fine sea salt
2 haddock fillets (skin on, approx. 350g/12oz total) (abadejo)
1 tablespoon sunflower oil
½ lemons (cut into wedges)

In the kitchen

Put a pan of water on for the broccoli, and when it comes to the boil, salt to taste and cook the frozen broccoli florets (unthawed) for 10 minutes from the time the water comes back to the boil, or until it’s tender enough to be puréed. Drain and return to the pan, along with 1 tablespoonful of cold-pressed coconut oil, and set about it with your stick blender, adding salt and pepper and a further tablespoon of oil to taste. Put the lid on and leave while you fry the fish, which is the work of moments.
Get out a plate in which the fish fillets can lie flat, and in it mix the flour, spices and salt, then dredge the fish on both sides, so that the fillets are well coated. Place a cast-iron pan or a heavy-based, non-stick frying pan – into which the fillets will fit neatly – on the stovetop or hob. In the case of the cast-iron pan, heat it before adding the sunflower oil; if using a non-stick frying pan, add the oil first.
When the oil is hot, put both fillets in the pan, skin-side down, and cook for 3 minutes. Turn them over and cook for another 1½ minutes, or until the fish is just cooked through. These timings are based on fillets that are – as you can see – square-ish and quite thick. If yours are thinner, 2 minutes skin-side down, followed by 1 minute on the other side, should do it.
Once the fish is cooked, transfer to a plate lined with kitchen roll while you dollop the broccoli purée onto 2 dinner plates. Add the haddock fillets, crisp-skin-side-up, and eat with calm relish, and possibly a spritz of lemon.

Fuentewww.nigella.com

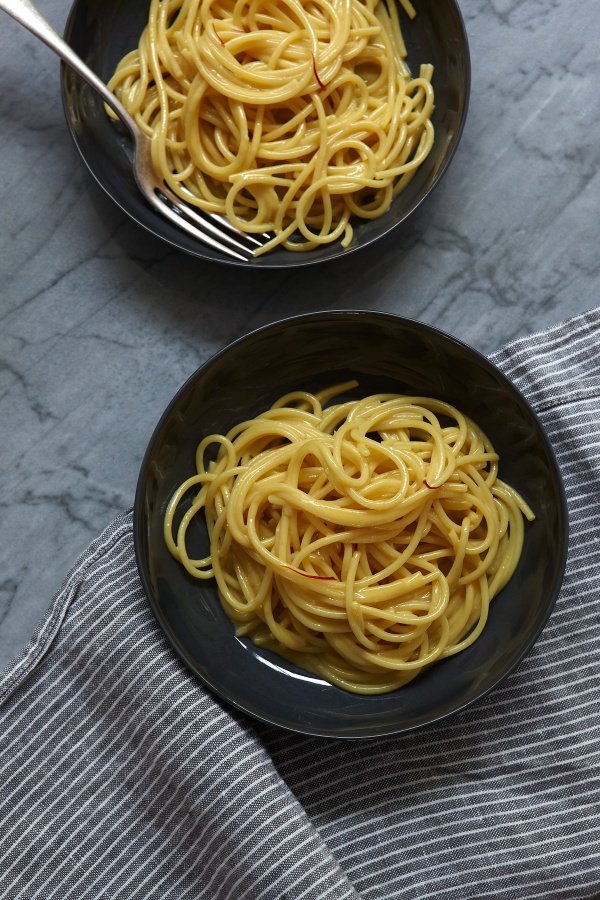
{Yellow spaghetti}

Yellow Spaghetti

Although this recipe does not itself issue from Italy, the inspiration is entirely Italian. One of my favourite things to eat is a risotto Milanese, sometimes called "risotto giallo" - or yellow risotto - and it occurred to me that pasta cooked similarly, or at least cooked to taste similar, would be perfect, and very easy.

So here it is: spaghetti in an eggy, saffron-tinted, lightly cheesed and creamy sauce: it is a bowlful of golden heaven.

Serves: 2

At the market

¼ teaspoon saffron strands (hebras de azafrán)
3 tablespoons marsala
200 grams spaghetti
salt (to taste)
2 large eggs
4 tablespoons grated parmesan (plus more to serve)
2 tablespoons double cream
salt to taste
pepper to taste
1 tablespoon soft unsalted butter

In the kitchen

Put plentiful water on for the pasta and at the same time put the saffron and Marsala into the littlest saucepan you have - such as one you'd melt butter in - and when the Marsala starts bubbling, take it off the heat and leave to steep.
When the pasta water comes to the boil, salt generously, then add the spaghetti and cook according to packet instructions, though start testing 2 minutes early. You want to make sure it's al dente, as it will swell a little in the sauce later.
While the spaghetti is cooking, get on with the creamy sauce, by whisking together the eggs, cheese and cream in a small bowl, adding a sprinkling of salt and a grinding of pepper.
Just before draining the spaghetti, remove a cupful of the starchy cooking liquid, then return the loosely drained pasta to its pan along with the butter and toss it over a low heat. Add 2 tablespoons of the pasta-cooking liquid to the saffron and Marsala in the little pan before pouring it over the pasta. Toss straightaway, working the sauce through the spaghetti, and watch the pale yellow of the spaghetti strands take on the deeper tint of the saffron; then remove the pan from the heat.
Now throw the egg, cheese and cream mixture over the pasta, and toss to combine gently but thoroughly, before checking for seasoning and dividing between 2 warmed bowls or plates. Serve with more grated Parmesan on the side.

Fuentewww.nigella.com

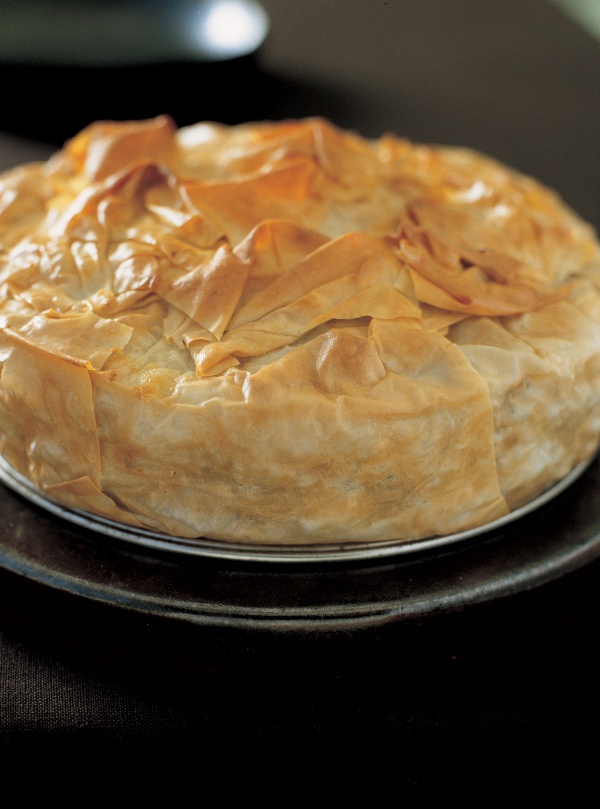
{Courgette and chick pea filo pie}

Courgette and Chick Pea Filo Pie

I can't claim this as an Iranian creation, but I certainly had the tastes and fragrances of some Iranian dishes in mind.

Serves: 6-8

In the market

½ teaspoon cumin
1 small onion (finely diced)
2 tablespoons olive oil
½ teaspoon turmeric (cúrcuma)
1 teaspoon ground coriander
3 plump courgettes (zucchini grandes)
125 g. basmati rice
500 ml. vegetable stock
2 x 400 g. tins chickpeas (drained)
100 g. melted butter
200 g. filo pastry

In the kitchen

Preheat the oven to 200ºC/gas mark 6/400ºF and put in a baking sheet.
Gently fry the cumin seeds and onion in the olive oil until the onion's soft. Add the turmeric and coriander. Dice the courgettes (unpeeled), add them to the onion mixture, and cook on a fairly high heat to prevent the courgettes becoming watery. When they are soft but still holding their shape, add the rice and stir well, letting the rice become well coated in the oil.
Add the stock 100ml / ½ cup at a time, stirring while you do so. When all the liquid has been absorbed the rice should be cooked, so take it off the heat, stir in the chick peas and check the seasoning.
Brush the insides of a 22cm / 9 inch springform tin with some of the melted butter. Line the bottom and sides of the tin with 3/4 of the filo, buttering each piece as you layer. Leave a little filo overlapping the sides, and keep 3-4 layers for the top. Carefully put in your slightly cooled filling, and then fold in the overlaps. Butter the last layers of filo and scrunch on top of the pie as a covering.
Brush with a final coat of butter, and put in the oven for about 20 minutes, or until the filo is golden and the middle hot. Check this by inserting a slim, sharp-bladed knife (or cake-tester). If, when you remove it, it feels hot when you press it against your wrist, the pie's ready.

Fuentewww.nigella.com

{Scallops with Thai scented pea puree}

Scallops With Thai Scented Pea Puree

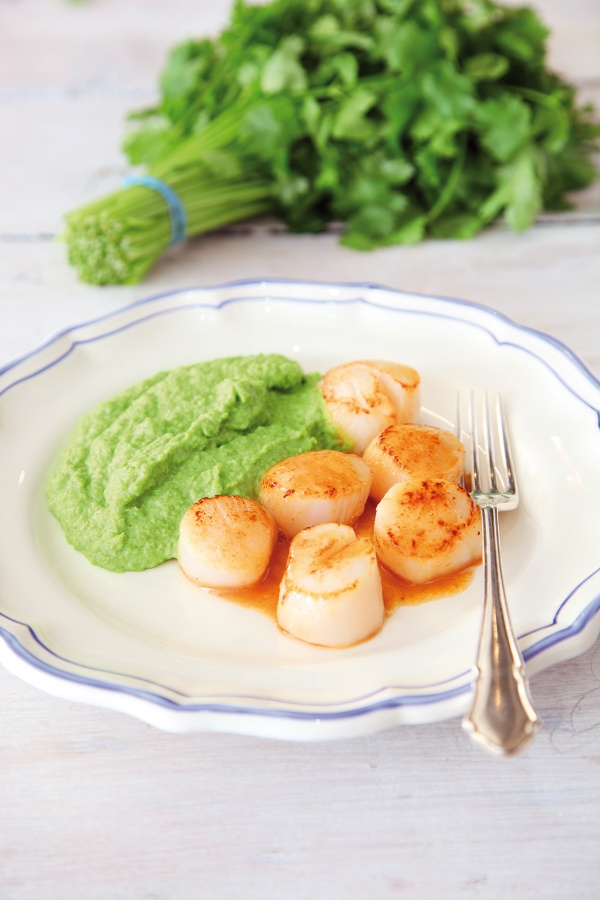
I love the bouncy sweetness of scallops and, although you might think the equal sweetness of the peas would be too much alongside, the deep flavour of coriander and chilli and the sharpness of lemongrass miraculously provided by the Thai green curry paste, make it a zingy and yet still comforting accompaniment. This is a real treat of a supper, both for the eater and the cook.

Serves: 2

In the market

500 g. frozen petits pois
1 tablespoon green thai curry paste
75 g. creme fraiche
Sea salt flakes (to taste)
2 teaspoons groundnut oil (or other flavourless oil)
2 teaspoons butter
6 large scallops (preferably diver caught) (or 10-12 small ones)
juice of 1 lime
2 tablespoons chopped fresh coriander (or Thai basil)

In the kitchen

Cook the peas in boiling, slightly salted water until tender, then drain and tip into a blender, adding 1 tablespoon curry paste and the crème fraîche. Season to taste with salt and perhaps add more curry paste, depending how strong it is.
Heat the oil and butter in a frying pan until foamy, then fry the scallops for about 2 minutes a side. If you are using big scallops, then it is sometimes easier to cut them in half across. When they are cooked, they will have just lost their raw look in the middle and be lusciously tender, while golden and almost caramelized on the outside.
Lift the scallops onto 2 warmed plates and then de-glaze the hot pan by squeezing in the lime juice. stir to mix well and pick up every scrap of flavour, then pour this over the scallops on each plate.
Dish up the pea purée alongside the scallops, and sprinkle with the chopped coriander or thai basil. Serve with another wedge of lime, if you feel like it.

Fuente: www.nigella.com

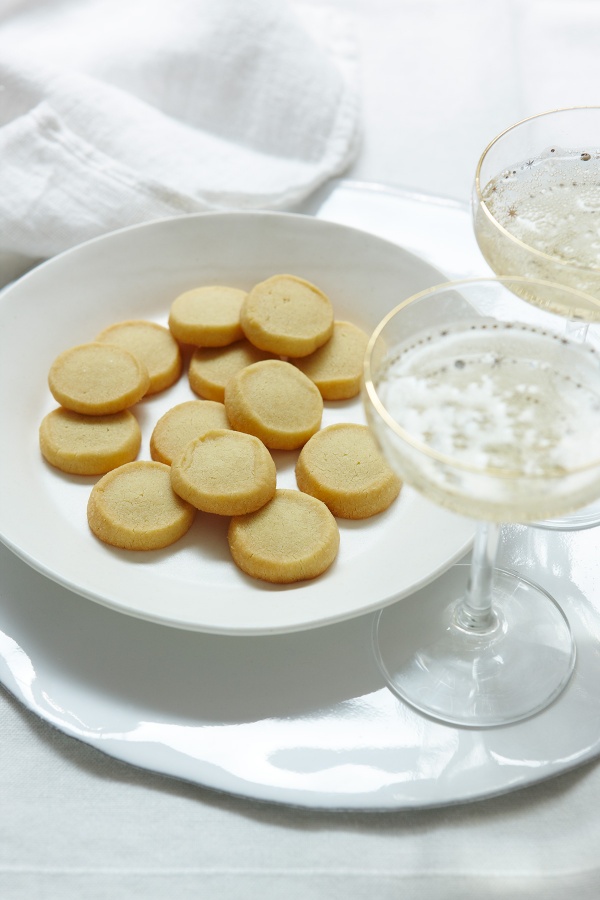
{Parmesan shortbreads}

Parmesan Shortbreads

Makes: 35-40 shortbreads

This is an Italian-inspired recipe that comes to me from Australia via Brazil. To explain: a Brazilian friend, and the best cook I know, Helio Fenerich made it for me, and I had to keep (rudely) asking him to carry on making it for me. Eventually, I begged him for the recipe, which he told me he’d found in Australia. The journey was certainly worthwhile: it is a complete winner; I go into auto-Parmesan-shortbread mode whenever I have friends coming for supper, as not only is it perfect with drinks, but it can be made in advance.

Indeed, you can make the dough, wrap it and then leave in the fridge for up to 3 days before slicing and baking it as instructed below, although you will need to let these cheese-scented cylinders sit out on a kitchen surface just long enough to get the fridge-chill off them before slicing.

In the market

150 g. plain flour
75 g. grated parmesan
100 g. soft unsalted butter
1 large egg yolk

In the kitchen

1) Mix all the ingredients together, using bowl and spoon, electric mixer or food processor as wished, until a golden dough begins to form a clump.
2) Turn it out onto a surface and knead for about 30 seconds until smooth, then divide into two.
3) Take the first half and, using your hands, roll it into a cylinder, as uniform as possible without stressing over it, about 3 cm (1¼ inches) in diameter.
4) Make sure the ends are flat, too, so that the cylinder resembles a roll of coins. Now roll this up in a piece of clingfilm, twisting the clingfilm at the ends, like a Christmas cracker, and put the roll in the fridge, then proceed in the same way with the remaining half of the dough.
5) Preheat the oven to 180° C (350º F) while the wrapped cylinders of dough rest in the fridge for about 45 minutes, by which time you should be able to cut them into thick slices easily: aim for about 1 cm (½ inch) thick.
6) Arrange on a baking sheet lined with baking parchment, and put in the oven for 15–20 minutes, when they should be just beginning to turn a pale gold at the edges.
7) Remove from the oven, then leave to cool (if you can) before eating.

Fuentewww.nigella.com

{Apple Latkes}


Recipe courtesy of Nigella Lawson

Total Time: 35 min
Prep: 20 min
Cook: 15 min
Yield:20 latkes
Level:Intermediate

Ingredients

1 large egg
1/3 cup plain Greek yogurt plus 1/3 cup low-fat milk, or 2/3 cup natural plain yogurt
1 cup all-purpose flour
1/2 teaspoon baking powder
1/4 teaspoon baking soda
1/2 teaspoon ground cinnamon
2 tablespoons superfine sugar
2 apples (1/2 pound), to make
1 cup grated apples Vegetable oil, for frying
Maple syrup (or confectioners' sugar and ground cinnamon), for serving

Directions

Beat the egg with the yogurt and milk (or just the yogurt, if you're using the plain normal variety) and set aside. Combine the flour, baking powder, baking soda, cinnamon and sugar in a bowl. Peel, quarter and core the apples, then grate them; I use a food processor, but a coarse Microplane or other grater would work easily, I'd imagine.
Pour the yogurt mixture into the flour bowl, tip in the grated apples and fold it together.
Pour enough oil to come about 1/4 inch up in a skillet and put on the stove to heat. Dollop spoonfuls -- I use a round soup spoon -- of the apple batter into the sizzling oil; a rubber spatula (the one you used to fold the batter together) will help you scrape the batter off the spoon and press down on the little latkes in the pan. Don't worry about making perfect round pancakes; I like these a bit raggedy and skew-whiff. Fry for a minute or two, until the latkes are a golden brown on the undersides; you can see from the top as they start firming up underneath. Flip them with 2 metal spatulas and fry for another minute on the uncooked side.
Remove to a tray lined with paper towels to blot the excess oil and continue cooking until you've used up all the batter. Top with maple syrup.

Recipe courtesy of Nigella Lawson for Food Network MagazineAdvertisement

Fuentewww.foodnetwork.com

{Breakfast cookies}


Recipe courtesy of Ellie Krieger

Total Time: 32 min
Prep: 20 min
Cook: 12 min
Yield:12 cookies, serving size 1 cookie
Level: Easy

Ellie Krieger bakes healthful and delicious cookies for breakfast.

Ingredients

3/4 cup whole-wheat pastry flour
1/2 cup harina común
1/2 cucharada de té de bicarbonato de sodio
1 cucharada de té de canela en polvo
1/2 cucharada de té de nuez moscada en polvo
1/4 cucharada de té de sal
2 cucharadas de unsalted butter
1/4 cup aceite de canola
1/4 cup azúcar morena
3 cucharadas de azúcar granulada
1 huevo
1/4 cup (1 small jar) strained carrot baby food
1 teaspoon vanilla extract
1/2 cup rolled oats
1/2 cup bran cereal flakes
1/3 cup raisins
1/3 cup walnut pieces, lightly toasted in a dry skillet for 2 minutes, until fragrant and chopped

Directions
Watch how to make this recipe.
Place rack in center of oven and preheat oven to 350 degrees F.
Whisk together flours, baking soda, cinnamon, nutmeg and salt in a medium-sized bowl. Combine butter, oil and sugars in the bowl of a stand mixer and mix on high speed, scraping down sides if necessary, until sugars have dissolved and mixture is light in color, about 1 minute. Add egg, carrot puree and vanilla and beat an additional 30 seconds. Add flour mixture and beat an additional 30 seconds. Add oats, flakes, raisins and walnuts and mix over low speed just until incorporated. Dough will be slightly sticky and less cohesive than traditional cookie dough. Line a large cookie sheet with parchment paper. Using between 3 to 4 tablespoons of batter, form a ball and place on cookie sheet. Repeat with remaining batter, leaving about 3 inches between cookies. Wet hands and use palm of hand to flatten cookies until about 1/4-inch thick. Bake for 12 minutes, until cookies are fragrant but still soft. Let cookies cool slightly, then transfer to a wire rack to cool completely.
2007 Ellie Krieger, All Rights Reserved

Read more at: http://www.foodnetwork.com/recipes/ellie-krieger/breakfast-cookies-recipe.html?oc=linkback

lunes, 19 de diciembre de 2016

{Cheddar Bread}


Buttermilk gives this cheesy quick bread a subtle tang and keeps it nice and moist. Serve with plenty of butter. Martha made this recipe on "Martha Bakes" episode 713.

YIELD: MAKES 1 LOAF
   
INGREDIENTS

4 tablespoons unsalted butter, melted and cooled, plus more for pan
2 1/2 cups unbleached all-purpose flour, plus more for pan
1 1/2 teaspoons baking powder
1 teaspoon kosher salt
1/2 teaspoon baking soda
7 ounces sharp cheddar cheese, grated
2 large eggs, room temperature
1 cup buttermilk, room temperature

DIRECTIONS

1) Preheat the oven to 350 degrees. Butter and flour a 4 1/2-by-8 1/2-inch loaf pan; set aside.
2) Whisk together flour, baking powder, salt, baking soda, and 6 ounces cheese; set aside.
3) In a separate bowl, whisk together butter, eggs, and buttermilk until thoroughly combined. Add to flour mixture and stir to combine.
4) Transfer to prepared pan; spread evenly with an offset spatula. Sprinkle over remaining 1 ounce cheese.
5) Bake until a skewer inserted in the center comes out with moist crumbs attached, 50 to 55 minutes. Transfer pan to a wire rack to cool for 5 minutes. Remove bread from pan and let cool completely on wire rack.

{Twice Baked Potato Casserole}


Total Time: 2 hr
Prep: 10 min
Inactive: 10 min
Cook: 1 hr 40 min
Yield:16 servings
Level:Easy

Bacon, cheese and green onions make Ree's Baked Potato Casserole a big hit.

Ingredients

1 pound thin bacon
16 russet potatoes
6 tablespoons canola oil
4 sticks (1 pound) salted butter, plus more for buttering baking dish
2 cups sour cream
2 cups grated Cheddar or Jack (or a mix of both), plus more for topping
2 cups whole milk
4 teaspoons seasoned salt
6 green onions, sliced
Kosher salt and freshly ground black pepper

Directions

Preheat the oven to 400 degrees F.
Cook the bacon in a saute pan until crispy; let cool and then crumble.
Scrub the potatoes, then place them on baking sheets. Rub the potatoes with the canola oil and bake until tender, 45 minutes to 1 hour. Remove the potatoes and lower the oven temperature to 350 degrees F.
Slice the butter into pats and transfer to a large mixing bowl. Add the bacon and sour cream. With a sharp knife, cut each potato in half lengthwise and scrape out the insides into the mixing bowl. Tear up 3 of the skins and throw them in. Smash the potatoes with a potato masher. Add the cheese, milk, seasoned salt, green onions and some salt and pepper and mix together well.
Butter a baking dish, and then spoon the mixture into the dish, top with more grated cheese and bake until warmed through, 25 to 30 minutes.
Recipe courtesy of Ree Drummond

Fuentewww.foodnetwork.com

{Baked Eggnog French Toast}


Use leftover eggnog for an epic breakfast

Congratulations! You’ve mastered homemade eggnog. (Delightful, right?) Now, if you happen to have any leftovers, we’ve got the recipe for you: eggnog French toast. Eggnog is basically a richer, more flavorful version of the egg custard used to make the breakfast classic, so it’s a total no-brainer. (Note: Store-bought nog works just fine, too.)

MAKES 4 SERVINGS
START TO FINISH: 1 HOUR 15 MINUTES

INGREDIENTS

2 tablespoons unsalted butter, at room temperature
1 large loaf crusty Italian bread
1¾ cups eggnog
3 eggs
1½ teaspoons cinnamon
½ teaspoon nutmeg
Pinch of cloves
1 teaspoon pure vanilla extract
Confectioners’ sugar, for serving
Maple syrup, for serving

DIRECTIONS

1. Preheat the oven to 350°F. Generously grease a 9-by-13-inch casserole dish with the room-temperature butter.

2. Slice the loaf of bread into ½-inch-thick slices and then arrange the slices in the prepared baking dish.

3. In a large bowl, whisk the eggnog with the eggs, cinnamon, nutmeg, cloves and vanilla extract to combine.

4. Slowly pour the custard over the bread, taking care to pour in between the slices as well to fully coat the bread. (If you find large spots uncovered, carefully drain any excess custard out of the dish and try a second time.)

5. Bake until the top is golden and crisp, 25 to 30 minutes. Let the French toast cool slightly and then finish with a sprinkling of confectioners' sugar. Serve warm with maple syrup.

Fuentewww.purewow.com

{Triple Chocolate Cookies}


Total Time: 1 hr 15 min
Prep: 15 min
Inactive: 30 min
Cook: 30 min
Yield:about 3 dozen cookies
Level:Easy

Ingredients

6 ounces bittersweet chocolate, coarsely chopped
2 ounces unsweetened chocolate, coarsely chopped
2 teaspoons instant espresso powder, such as Medaglia D'Oro
1/4 cup plus 2 tablespoons all-purpose flour
1/4 teaspoon baking powder
1/4 teaspoon fine salt
3/4 stick (6 tablespoons) unsalted butter, slightly softened
1/2 cup granulated sugar
1/4 cup packed light brown sugar
2 large eggs
2 teaspoons vanilla extract
1 cup toasted pecans, coarsely chopped
1/2 cup semisweet chocolate chips
1/2 cup best-quality white chocolate chips

Directions

1) Preheat the oven to 350 degrees F. Line baking sheets with parchment paper and set aside.
Place the bittersweet and unsweetened chocolate and espresso powder in a medium bowl and place over a pot of simmering water and melt, whisking occasionally, until smooth. Sift together the flour, baking powder and salt onto a piece of parchment or wax paper, or into a small bowl, and set aside.
In the bowl of an electric mixer fitted with the paddle attachment, beat the butter, granulated sugar and light brown sugar until lightly and fluffy, about 2 minutes. Add the eggs, one at a time, then the vanilla extract, and beat on high speed for 1 minute. On low speed beat in the melted chocolate mixture until just combined. Fold in the flour mixture with a rubber spatula until just combined. Stir in the pecans and chips. The batter will be loose. Cover and refrigerate until just firm, about 30 minutes.
Using a small ice cream scoop (about 1 tablespoon size), scoop heaping tablespoons of the batter onto the prepared baking sheets, putting 8 cookies on each sheet. Bake for 10 to 11 minutes. The surface will be dry and shiny but the tops and insides will still be soft. It will take no longer than 10 to 11 minutes so set the time. Cool on the baking sheets for 2 minutes, then remove to a rack to cool 5 minutes longer. Repeat with the remaining batter. These cookies are best eaten the day they are made. Wrap leftovers well in plastic wrap and store in an airtight container.

Fuentewww.foodnetwork.com

lunes, 12 de diciembre de 2016

{Croquetas de zucchini}


Ingredientes

240 grs de zucchini
3 cdas de eneldo fresco
2 cdas de perejil fresco
60 grs de queso emental rallado o queso blanco latino.
Vigila el punto de sal en cualquier caso
30 grs de cebolla rallada o cortada en cuadritos muy pequeños
2 huevos
75 grs de harina de trigo
Sal

Preparación

Pelamos y rallamos el calabacín y lo salamos, dejándolo escurrir por media hora en un colador. Pasado ese tiempo aplastamos el calabacín para terminar de sacarle toda el agua y si es preciso pásale un trozo de papel absorbente. Lo ponemos en un bol y le añadimos la harina tamizada, el queso, el eneldo, el perejil, la cebolla y los huevos. Mezclamos todo muy bien con una cuchara y rectificamos el punto de sal.

Para cocinarlas ponemos un sartén antiadherente con muy poco aceite, yo tengo la costumbre de usar muy poco aceite en la cocina…si te gusta y prefieres freírlas, lo dejo a tu elección. Dejamos calentar el aceite y vamos colocando raciones con la medida de una cuchara sopera.

Dejamos cocinar por cada lado a fuego medio y hasta que veáis que cada lado y ya está doradito, hacemos los mimo con toda la mezcla y  servimos caliente. Si las freistes, colócalas en papel absorbente previamente.

Fuentewww.cocinaconclau.com

{Pizza Pot Pie}

Pizza Pot Pie

Inspired by the famous pizza pot pie served at Chicago Pizza and Oven Grinder Co., we dreamed up a homemade version with the same oozy cheese.

Total Time: 2 hr 15 min
Prep: 20 min
Inactive: 1 hr
Cook: 55 min
Yield:4 servings
Level:Easy

Ingredients

8 ounces store-bought pizza dough
2 tablespoons olive oil
3 cloves garlic, roughly chopped
1 green bell pepper, roughly chopped
1 small yellow onion, roughly chopped
1 pound sweet Italian sausage, casings removed
One 24-ounce jar marinara sauce
1/2 teaspoon dried oregano
Pinch of red pepper flakes
Kosher salt and freshly ground black pepper
2 tablespoons unsalted butter, melted
12 ounces sliced Havarti

Directions

Put the pizza dough in a medium bowl and coat well with 1 tablespoon of the oil. Cover with plastic wrap and put in a warm place until doubled in bulk, about 1 hour depending on the dough.
Meanwhile, preheat the oven to 400 degrees F. Put the garlic, bell peppers and onions in a food processor and pulse until finely chopped, scraping down the sides of the bowl halfway through.
Heat the remaining 1 tablespoon oil in a medium saucepan over medium-high heat until shimmering. Add the sausage and cook, breaking it up with a wooden spoon, until lightly browned, about 4 minutes. Add the onion mixture and cook, stirring occasionally, until the moisture has evaporated from the pan and the onions are soft, about 5 minutes. Stir in the marinara sauce, oregano, red pepper flakes, 1/4 cup water, 1/2 teaspoon salt and several grinds of black pepper. Bring to a simmer, reduce the heat to medium low and cook, uncovered, stirring often, until thick, about 15 minutes.
Brush the sides and lip of a 1-quart (6-inch) ramekin with the butter. Line the bottom and sides with the Havarti. Fill with 1 1/2 cups of the hot marinara-sausage sauce. Reserve the remaining sauce for another use. Gently pull and stretch the pizza dough into a 10-inch circle and place it over the ramekin, leaving a 2-inch overhang all around. Gently press around the edges of the ramekin to lightly seal. Put on a baking sheet and bake until golden brown and the top sounds hollow when you tap it, about 30 minutes.
Carefully remove the baking sheet from the oven, transfer the ramekin to a heatproof surface and place a plate on top. Carefully invert the ramekin onto the plate, using a spoon to gently pry the dough from the dish. Serve hot.
Special equipment: a 1-quart (6-inch ramekin)

Fuentewww.foodnetwork.com

martes, 29 de noviembre de 2016

{Cheesy Twice-Baked Potatoes}


Tiempo de preparación: 20m
Tiempo de cocción: 1h y 25m
Tiempo total: 1h y 45m

Porciones: 8

En el mercado

4 papas rojizas, cepillada
4 cucharadas de manteca sin sal
1 diente de ajo, picado
1 cebolla morada (shallot), picada
1/2 taza de crema de leche (sour cream)
2 cucharadas de ciboulette fresca picada, y algo más para espolvorear
2 tazas de queso cheddar blanco rallado (alrededor de 230g)
Sal kosher y pimienta  negra fresca molida

En la cocina

1) Precalentar el horno a 220° C.
2) Pierce the potatoes with a fork or paring knife a few times on all sides. Place on a baking sheet and bake until fork-tender, 60 to 80 minutes. Let cool slightly (but keep the oven on).
3) Derretir la manteca en una sartén pequeña sobre fuego medio. Agregar el ajo y la ceboll y cocinar hasta que se ablanden pero no estén marrones, alrededor de 2 minutos. Reservar.
4) Una vez que las papas estén frías, cortar a lo largo en forma vertical. Usando una cuchara, retirar el interior dejando 0,6 cm de la capa, para preservar la forma de la cáscara.
5) En un bowl grande, hacer puré con el contenido, agregar la mezcla de la manteca, la crema de leche, la ciboulette y una (1) taza del queso, y mezclar. Salpimentar.
6) Colocar la mezcla en el interior de las cáscaras de papas y cubrir con la restante taza de queso.
7) Cocinar hasta que el queso esté dorado y burbujeante, de 25m a 30n.
8) Espolvorear con ciboulette y servir caliente.

Fuentewww.foodnetwork.com

{Navidad 2016}

Éste ha sido un buen año ... al menos, lo que va del mismo.

Hemos compartido momentos hermosos en familia. El K3 de Fran, su primer concert, el viaje a Miami y mi vuelta sola con Fran, afianzando la hermosa relación que tenemos con la tía Silvia. Hemos (y sobre todo "he") fantasiado con la idea de vivir en Miami. He armado una red de lindas relaciones con las mamás del cole. Fran es feliz con sus nuevos amigos. Con Diego estamos más tranquilos, más cerca, más unidos. Nuestros seres amados gozan de buena salud. Queda poco por pedir ...

Deseo que el año próximo, nos traiga más unión, más momentos de esos que hacen que todo recobre sentido nuevamente.

Es por eso que esta Navidad será muy importante para mí y es siempre que, a través de la cocina, así quiero sentirlo.

Tragos

Campari con jugo de naranja
Daiquiri durazno / frutilla (Ron Bacardi)
Trago maracuyá
Smirnoff Citrus con lima / helado limón

Entrada + Tragos

Plato principal

Vitello Tonatto
Beef Wellington by Michel Roux Jr.

Acompañantes

Cheesy twice-baked potatoes
Ensalada de papas asadas con panceta
Cheddar bread

Postre

Key lime pie by Joe's Stone Crab
Eton Mess Bombe
Mousse de maracuyá
Cheesecake de chocolate
Pan dulce de Leipzig

Licores

Homemade Baileys Irish Cream
Sheridan's

Bebidas

Chenin Santa Julia

martes, 22 de noviembre de 2016

{Torta de chocolate y naranja}


En el mercado

4 huevos
200 ml de crema (usar el pote como medidor)
1 pote de azúcar
1 pote de cacao o Nesquik
2 potes de harina leudante
Ralladura de 2 naranjas chicas o una grande
Jugo de una naranja

En la cocina

1) Batir los huevos y agregar la crema, el azúcar y seguir batiendo.
2) Agregar los ingredientes secos (harina y cacao).
3) Al final, agregar la ralladura de naranja y el jugo.
4) Enmantecar y enharinar el molde de budín (redondo con un agujero en el centro).
5) Cocinar a horno medio (160-180 grados) durante 40  minutos.

martes, 15 de noviembre de 2016

{Revista Susana}

http://www.revistasusana.com/1796095-como-preparar-las-verdaderas-empanadas

http://www.revistasusana.com/1488345-fernando-trocca-prepara-un-risotto-de-brocoli-bien-italiano

http://www.revistasusana.com/1495958-la-marquise-de-chocolate-de-mauricio-asta

http://www.revistasusana.com/1498175-protocolo-el-arte-de-recibir-en-casa

http://www.revistasusana.com/1501839-macarons-por-mauricio-asta

http://www.revistasusana.com/1482042-pablo-massey-te-ensena-a-hacer-una-mousse-de-maracuya

http://www.revistasusana.com/1547014-tragos-para-bajar-la-temperatura

http://www.revistasusana.com/1606193-sopas-tres-clasicas-recetas-para-conjurar-el-frio

http://www.revistasusana.com/1630324-aprende-a-hacer-una-ganache-de-chocolate-blanco-y-gelee-de-maracuya

http://www.revistasusana.com/1661213-4-tragos-para-cualquier-momento-del-dia

http://www.revistasusana.com/1667172-aprende-a-hacer-rabas-con-mayonesa-de-chiles

http://www.revistasusana.com/1677749-aprende-a-hacer-tarta-de-ratatouille-y-queso-bluebert

http://www.revistasusana.com/1686559-bunuelos-de-manzana-para-una-tarde-en-familia

http://www.revistasusana.com/1584401-sorbete-de-tequila-y-flan-blanco-de-limon-para-sorprender-a-tus-amigos

http://www.revistasusana.com/1479380-dolli-irigoyen-prepara-un-cordero-para-combatir-el-frio

http://www.revistasusana.com/1470526-donato-de-santis-te-ensena-a-hacer-la-verdadera-pizza-italiana

http://www.revistasusana.com/1767023-recetas-para-una-noche-romantica

http://www.revistasusana.com/1705124-gnocchi-a-la-romana-para-rememorar-los-sabores-de-la-nonna

http://www.revistasusana.com/1937020-selva-negra-un-festin-de-chocolate

http://www.revistasusana.com/1925995-temporada-de-sopas-2-recetas-supernutritivas

http://www.revistasusana.com/1921662-recetas-con-encanto-italiano

http://www.revistasusana.com/1850120-cuatro-recetas-japonesas-para-lucirte

lunes, 14 de noviembre de 2016

{Alfajor Rogel para disfrutar en familia}


Mayo es el mes de la Patria y para celebrarlo la chef Pía Fendrik nos explica cómo realizar este postre bien argentino
   

todo el norte argentino conserva sus sabores tradicionales intactos, especialmente en la provincia de Santiago del Estero. Aquí presentamos el famoso alfajor santiagueño, el pastel favorito de las fiestas familiares en la Argentina

INGREDIENTES PARA LA MASA (RINDE 12 PORCIONES)
400 g (3 tazas de harina)

8 yemas

1 huevo

2 cdas. de azúcar

50 g de mantequilla o manteca

2 cdas. de agua

2 cdas. de alcohol (se puede usar el farmacéutico)

Para el relleno

1 kg de dulce de leche

Para el merengue

150 g de azúcar

4 claras

PROCEDIMIENTO
Para la masa, hacer una corona con la harina y colocar en el centro el resto de los ingredientes. Unir primero con cuchara de madera y luego con las manos, hasta obtener una masa lisa.

Dejar descansar 30 minutos. Sobre la mesa enharinada, formar un cilindro y dividirlo en 10 porciones iguales.

Estirar cada una en forma de círculos bien delgados, de unos 20-25 cm de diámetro (estirar un poco y girar la masa, varias veces, con pequeños movimientos).

Apoyar un plato encima de cada círculo y recortar en forma pareja. Pincharlos con un tenedor y cocinarlos de a uno por vez, en horno fuerte (220-240 ºC), hasta que estén apenas dorados (unos 5-7 minutos).

Una vez frías, untar cada capa con dulce de leche y armar el Rogel, colocándolas una encima de otra.

Decorar a gusto, cubriendo con merengue sólo por encima, o todo el postre.

Para hacer el merengue italiano, colocar el azúcar en una cacerola y cubrir con agua.

Cocinar hasta que la gota que caiga de la cuchara se transforme en un hilo.

Batir las claras hasta que estén espumosas.

Agregar el almíbar poco a poco, sin dejar de batir, hasta que se enfríe y se obtenga un merengue firme.

{RIGATONI ALLA NORMA}


Prepará la pasta más rica al mejor estilo italiano. Los chefs de la Academia Barrilla nos hacen viajar con sus recetas y rememorar los olores y los sabores de la nonna. ¡Para agasajar a la familia!
   
ingredientes (Para 4 porciones)-Tiempo de preparación 1 h 10’

• 350 g de pasta Rigatoni

• 1 berenjena grande

• 30 ml de aceite de oliva extra virgen + cantidad necesaria para freír

• 50 g de cebollas

• 1 diente de ajo

• 1 kg de tomates

• 6 hojas de albahaca

• 50 g de ricota

• Sal y pimienta a gusto

• Harina, cantidad necesaria

Preparacion

-Lavar y secar la berenjena. Cortarla en daditos, salarla ligeramente y dejarla escurrir en un colador unos 30 minutos para que suelte su jugo amargo.

-Luego, pasar los dados por harina y freírlos en abundante aceite de oliva extra virgen. Escurrir sobre papel absorbente.

-Para preparar la salsa, picar groseramente la cebolla y ablandarla en una cacerola en el aceite, junto con el diente de ajo entero.

-Incorporar los tomates lavados y cortados en daditos pequeños, sazonar con sal y pimienta y cocinar unos 10 minutos.

-Cuando la salsa de tomates esté lista, añadirle los daditos de berenjenas fritos.

-Mientras tanto, cocinar las pastas Rigatoni en abundante agua con sal, escurrirlos cuando estén "al dente" y verterlos en un recipiente grande. Estar atentas para evitar que la pasta se cocine de más.

-Verter la salsa sobre las pastas, revolver y por último añadir la albahaca.

-Rallar ricota como si fuera queso. Servir las pastas en platos profundos y luego espolvorear con la ricota rallada..

{LENGUADO CON PURÉ DE COLIFLOR Y ARVEJAS FRESCAS}


INGREDIENTES

(para 4 personas)

800 g de lenguado (200 g por persona)

3 limones

1 coliflor

Papel aluminio

Arvejas frescas

5 cucharadas de leche

Aceite de oliva

Tomillo y salvia frescos

Sal y pimienta

PREPARACIÓN

Para el lenguado: poner las piezas en un recipiente para horno, marinarlas en aceite de oliva, tomillo fresco picado, cáscara de limón y pimienta negra molida gruesa. Reservar esta preparación. Llevar a horno precalentado a 180 grados por 15 minutos, aproximadamente. Primero con la piel para abajo y a mitad de la cocción, darlo vuelta.

Para hacer el puré: lavar la coliflor, ponerla sobre una hoja de papel aluminio, rociar con aceite de oliva, hierbas picadas, sal y pimienta. Rociar con vermú blanco y cerrar el paquete, para que la coliflor se cocine al vapor. Cocinar la col por 25 minutos en el horno o hasta que esté bien blanda, como para hacer un puré. Retirar. Procesar con unas cucharadas de leche tibia condimentada con sal y pimienta.

Mientras, cocinar las arvejas frescas en abundante agua con sal, hasta que estén tiernas.

Armado: en una fuente, poner de un lado el puré de coliflor con las arvejas por encima y del otro, los lenguados bien dorados. Acompañar con cuartos de limón.

lunes, 7 de noviembre de 2016

{Tarta de lima y óreo}

https://es.tastemade.com/videos/torta-de-lima-y-oreo

{Butter Pie Crust}


Tiempo total: 1h y 30m
Nivel: fácil

En el mercado

1 y 3/4 tazas de harina común (all-purpose flour) y un poco más, para espolvorear
1/2 cucharadita de sal
2 cucharadas de azúcar
12 cucharadas (170g, 1 y 1/2 sticks) manteca fría, cortada en cubos
4 cucharaditas de vinagre blanco o de manzana

En la cocina

1) Mezclar la harina, la sal y el azúcar, en una procesadora.
2) Agregar alrededor de 1/3 de la manteca (4 cucharadas, 57g) y procesar hasta que la manteca se integre.
3) Hacer un crumb grueso con la manteca restante, agregar el vinagre y mezclar rápidamente unas pocas veces, mientras se agregar 1/3 taza de agua helada.
4) Apretar algo de masa entre los dedos. Ésta debería mantender su forma; si todavía se desmigaja (quickly) agregar más agua helada de a cucharadas grandes. No trabajar demasiado la masa.
5) Cubrir la masa con papel film, hacer presión y achatar en un círculo fino. Refrigerar durante una (1) hora.
6) Colocar la masa en una fuente redonda de 11inch-12inch (28cm-30cm), de alrededor de 0,3cm de grosor, sobre una superficie levemente enharinada.
7) Armar el repulgue y refrigerar nuevamente durante, al menos, 30 minutos más, antes de utilizar.

Fuentewww.foodnetwork.com

jueves, 3 de noviembre de 2016

{Key Lime Pie by Joe’s Stone Crab}


Porciones: 6-8

En el mercado

- Graham Cracker Crust

1 paquete de graham crackers (1/3 de una caja de 1 pound (450g) o 1 taza más 2 1/2 cucharadas de las galletitas molidas)
5 cucharadas de manteca derretida
1/3 taza de azúcar

- Filling

3 yemas de huevo
Ralladura de cáscara de 2 limas (alrededor de 1 y 1/2 cucharaditas)
1 (14-ounce; 400 g.) lata de leche condensada
2/3 taza de jugo fresco de lima

- Topping

1 taza de crema de leche fría
3 cucharadas de azúcar impalpable

En la cocina

- For the graham cracker crust

Preheat the oven to 350 degrees. Butter a 9-inch pie pan. Break up the graham crackers: place in a food processor and process to crumbs. (If you don't have a food processor, place the crackers in a large plastic bag: seal and then crush the crackers with a rolling pin.) Add the melted butter and sugar and pulse or stir until combined. Press the mixture into the bottom and sides of the pan, forming a neat border around the edge. Bake the crust until set and golden, 8 minutes. Set aside on a wire rack. Leave the oven on.

- For the filling

Meanwhile, in a electric mixer with the wire whisk attachment, beat the egg yolks and lime zest at a high speed until very fluffy, about 5 minutes. Gradually add the condensed milk and continue to beat until thick, 3 or 4 minutes longer. Lower the mixer speed and slowly add the lime juice, mixing just until combined, no longer. Pour mixture into the pie crust. Bake for 10 minutes, or until the filling has set. Cool on a wire rack, then refrigerate. Freeze for 15 to 20 minutes before serving.

- For the topping

Whip the cream and the confectioners' sugar until nearly stiff. Cut the pie in wedges and serve very cold, topping each wedge with a large dollop of whipped cream.

FuenteJoe's Stone Crab y Food Network

viernes, 23 de septiembre de 2016

{Irish tradicional food}

https://www.google.com.ar/webhp?sourceid=chrome-instant&ion=1&espv=2&ie=UTF-8#q=boxty%20recipe

https://www.google.com.ar/webhp?sourceid=chrome-instant&ion=1&espv=2&ie=UTF-8#q=black%20pudding%20recipe

http://www.bbc.co.uk/food/chefs/nigel_slater

https://www.google.com.ar/webhp?sourceid=chrome-instant&ion=1&espv=2&ie=UTF-8#q=irish%20scones

https://www.google.com.ar/webhp?sourceid=chrome-instant&ion=1&espv=2&ie=UTF-8#q=christmas%20cake

http://blogs.lanacion.com.ar/cocina-amateur/recetas-con-manzanaas/postre-irlandes-de-manzanas-con-canela-y-pasas/


jueves, 22 de septiembre de 2016

{Wilton recipes}

Macaron
http://www.wilton.com/french-macaron-cookies/WLPROJ-8606.html

Cake pops
http://www.wilton.com/basic-cake-pops/WLRECIP-376.html

Cake & cupcakes
http://www.wilton.com/chocolate-buttercream-icing/WLRECIP-42.html
http://www.wilton.com/white-chocolate-buttercream-icing/WLRECIP-139.html
http://www.wilton.com/creamy-vanilla-custard-cupcakes/WLRECIP-735.html
http://www.wilton.com/jelly-doughnut-muffins/WLRECIP-8253.html
http://www.wilton.com/lemon-lavender-cupcakes/WLRECIP-663.html
http://www.wilton.com/americas-celebration-cake/WLRECIP-109.html
http://www.wilton.com/chocolate-cake-with-chocolate-buttercream-icing/WLRECIP-358.html
http://www.wilton.com/lemon-cake/WLRECIP-298.html
http://www.wilton.com/chocolate-chocolate-cake/WLRECIP-92.html
http://www.wilton.com/chocolate-filling/WLRECIP-158.html


Fudge
http://www.wilton.com/fudge/WLRECIP-37.html
http://www.wilton.com/cake-brownies/WLRECIP-266.html

Tart
http://www.wilton.com/key-lime-mini-pies/WLRECIP-8535.html
http://www.wilton.com/baked-breakfast-egg-tarts/WLRECIP-8245.html


Cookies
http://www.wilton.com/chocolate-chip-cookies/WLRECIP-500.html
http://www.wilton.com/alfajores/WLTREAT-32.html

Bites
http://www.wilton.com/cheesy-muffin-tin-potato-tots/WLRECIP-8559.html
http://www.wilton.com/buffalo-chicken-bites-and-mini-apple-pies/WLRECIP-8566.html
http://www.wilton.com/bacon-cheddar-and-chive-corn-muffins/WLRECIP-8248.html
http://www.wilton.com/rosemary-and-pepper-crackers/WLTREAT-7.html
http://www.wilton.com/cranberry-and-black-pepper-gougeres/WLTREAT-25.html
http://www.wilton.com/orange-carrot-tea-bread/WLRECIP-5292.html

Quiche
http://www.wilton.com/zucchini-quiche/WLRECIP-778.html
http://www.wilton.com/caprese-quiche/WLRECIP-668.html

Pizza
http://www.wilton.com/breakfast-pizzas/WLPROJ-8642.html
http://www.wilton.com/sausage-and-pepper-pizza/WLRECIP-333.html

Chicken
http://www.wilton.com/crispy-roasted-lemon-chicken-legs/WLRECIP-8558.html

jueves, 15 de septiembre de 2016

{Betty Crocker}

Cheese and bacon grain scones

Chocolate scones

Bacon cheddar monkey bread

Chocolate malt ice-cream cake

http://www.bettycrocker.com/recipes/cake-batter-pancakes/b2b774ef-e2b8-45b5-86aa-5c8387009934

http://www.bettycrocker.com/recipes/rainbow-layer-cake/4969fed8-141e-45f5-9a04-e03addd20fbb

http://www.bettycrocker.com/recipes/lucky-charms-leprechaun-hat-cake/c0f41bac-b8c1-4c19-ab8e-5baadb88086f

http://www.bettycrocker.com/menus-holidays-parties/mhplibrary/birthdays/10-incredible-birthday-cakes

http://www.bettycrocker.com/recipes/chocolate-cherry-ice-cream-cake/8248b9c1-bb18-4ac2-a42a-2138381cccf2

http://www.bettycrocker.com/recipes/pepper-jack-cheese-quick-bread/36a964a8-a529-4b06-bd38-a53528e9038a

http://www.bettycrocker.com/recipes/cornbread-with-chiles-and-bacon/baa4b3ce-7523-4126-9860-a8ec9db5e69a

http://www.bettycrocker.com/recipes/dishes/breads-and-roll-recipes/cinnamon-roll-recipes

http://www.bettycrocker.com/recipes/courses/breakfast-and-brunch-recipes/scone-recipes

http://www.bettycrocker.com/recipes/dishes/dips


domingo, 11 de septiembre de 2016

{Sencillo y delicioso bizcocho de yogurt}


En el mercado (utilizando como medida el vaso del yogurt)

3 huevos
2 medidas de azúcar
1 yogurt natural (o de vainilla)
Ralladura de un limón (o 1 cucharada de esencia de vainilla, si se utiliza yogur de vainilla)
1 medida de aceite de girasol
3 medidas de harina (se puede reemplazar la harina y la levadura, por harina leudante)
1 cucharadita colmada de levadura química
1 pizca de sal

En la cocina

1) Precalentar el horno a 180º.
2) Untar con abundante manteca, un molde para cake.
3) Introducir los huevos y el azúcar en un bol grande. Batir hasta que blanquee y se vuelva espumoso.
4) Incorporar el yogurt, la ralladura de limón y el aceite. Batir de nuevo hasta obtener una mezcla uniforme.
5) Tamizar la harina junto con la levadura y la sal, sobre la mezcla anterior. Con ayuda de una espátula de cocina mezclar hasta que la harina esté completamente integrada y no queden grumos.
6) Repartir la masa dentro del molde y hornear durante unos 30/40 minutos o hasta que, al introducir una aguja dentro del bizcocho, esta salga limpia.

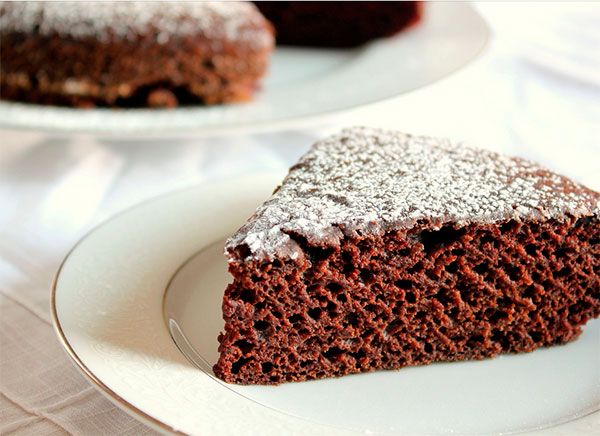
{Fabuloso pastel de chocolate, de los baker Brothers}


lunes, 15 de abril de 2013


La vida está hecha de pequeños detalles ... levantarte por las mañanas y despertar a tus hijas que están en su cama calentitas como un bollito recién hecho!, regar las plantas al sol y mojarte los pies, pintarte los labios de rojo para salir a tomar un café con lindas amigas al bar del pueblo :), mirar fijamente al sol hasta que te hace estornudar, sonreír a un desconocido y que te devuelva la sonrisa ... tantas cosas hacen que un día sea hermoso!!!!
Disfrutar de nuestra vida depende de no dejar pasar esos pequeños momentos que a veces se esconden inadvertidos entre el maremágnum del día a día. Disfrutar, a veces puede ser tan fácil como pegar un mordisquito a un jugoso pastel de chocolate como este :), no pensar en las calorías y dejarse llevar por la sencillez de esos pequeños placeres que nos regala la vida!!!.

Los fabulosos hermanos panaderos nos ofrecen un pastel super sencillo, de textura esponjosa y tierna que no os defraudará... quien se anima con él antes de que comience el calor y empecemos con los helados??? ;)


Fuente "Glorius British Grub" The fabulous baker brothers


Ingredientes:

- 170 gr de harina con levadura incorporada.
- 2 y 1/2 cucharadas de cacao puro en polvo.
- 1 cucharadita de bicarbonato.
- 115 gr de azúcar.
- 170 gr de Golden Syrup (yo lo sustituyo por jarabe de azúcar que venden en Ikea y hay quien lo hace con jarabe de maíz).
- 140 ml de leche.
- 140 ml de aceite de girasol.
- 2 huevos grandes.

Para la ganache de chocolate:
- 500 gr de chocolate para fundir.
- 500 ml de nata líquida.
- 1 cucharada de Golden Syrup.


Preparación:

- Precalentar el horno a 160º. Engrasar un molde alto de 18 o 20 cm. tened en cuenta que cuanto más grande sea el molde, más fino será el pastel y antes se horneará.

- En un bol grande introducir y mezclar los elementos secos. Añadir el Golden Syrup o jarabe de azúcar, la leche y mezclar muy bien con una batidora de varillas. Yo lo hago con la KA.

- Batir los huevos con el aceite e incorporar poco a poco a la anterior mezcla mientras batimos el conjunto. Introducir en el molde engrasado y hornear durante una hora o hasta que, al insertar un palillo salga seco. Este pastel crece en el horno, siempre deberéis llenar el molde no más de dos tercios de su capacidad.

- Mientras tanto haremos la ganache. Introducir en un bol resistente al calor todos los ingredientes. Disponer el bol sobre una olla de diámetro más pequeño que este, con agua hirviendo. Remover constantemente hasta que el chocolate esté completamente fundido y brillante. El agua hirviendo no debe tocar el fondo del bol.

- Reservar la ganache y dejar que se enfríe ligeramente mientras el pastel termina de hornearse. Os aconsejo que apartéis una pequeña cantidad de ganache para el relleno del pastel, de ese modo este se enfriará más, y tendrá más consistencia a la hora de rellenar.

- Retirar del horno el pastel y dejar enfriar dentro del molde. Volcar sobre una rejilla y dividir por la mitad. Cubrir una de las partes con la ganache que hemos reservado para el relleno y volver a poner la parte superior. Verter el resto de cobertura sobre el pastel dejando que el chocolate se reparta sobre toda la superficie y cubra sus lados. Una vez bien cubierto, dar un par de golpes secos a la rejilla sobre la que está colocado para que la cobertura se asiente y dejar enfriar completamente.

miércoles, 7 de septiembre de 2016

{Pan de ajo}

Pan de ajo Cortamos las baguettes en rebanadas sin llegar hasta abajo. Después mezclamos en un bol la mantequilla con dientes de ajo y perejil muy picaditos. Ponemos en cada raja de las baguettes un poco de esta mantequilla. Horneamos a 200º durante 10-15 minutos, hasta que el pan esté dorado. Servimos caliente. #Pan #Ajo #RecetasSaludables:

En el mercado

Baguettes
Manteca
Ajo
Perejil

En la cocina

1) Cortar las baguettes en rebanadas sin llegar hasta abajo.
2) En un bowl, mezclar la manteca con los dientes de ajo y el perejil muy picaditos.
3) Poner en cada raja de las baguettes un poco de esta manteca.
4) Hornear a 200º durante 10-15 minutos, hasta que el pan esté dorado.
5) Servir caliente.

{Pan dulce de Leipzig}


Ingredientes (para 2 stollen)

Esponja

30g de levadura prensada
½ taza de leche tibia
2 cucharadas de azúcar
1 cucharada de harina

Masa

3 yemas
1 taza de leche
100g de manteca derretida
200g de azúcar
ralladura de un limón
3 claras a nieve
harina c/n (1kg aprox.)
100g de pasas de uva sin semilla
100g de nueces picadas grueso
100g de almendras peladas
4 cucharadas de cáscaras de naranja abrillantadas
100g de avellanas peladas
100g de cerezas confitadas

Varios

Manteca derretida para pintar la masa

Preparación de la esponja

Disuelva la levadura en la leche tibia junto con las dos cucharadas de azúcar y la cucharada de harina. Bata todo hasta que se formen globitos en la superficie.
Tape flojamente y espere a que la levadura fermente y se transforme en una esponja.

Masa

Ponga las yemas en un bol y bátalas mientras le agrega la leche, la manteca derretida y tibia, el azúcar y la ralladura de limón.
Súmele la “esponja de levadura” y las claras batidas a nieve.
Bata la mezcla con la mano abierta mientras le incorpora la harina, hasta obtener un bollo tierno que no se pegotee y que se desprenda fácilmente de las paredes.
Coloque la masa en un bol limpio, tápela flojamente y déjela leudar al doble en un sitio tibio.
Cuando ya leudó, vuélquela sobre la mesa y mézclele las pasas, las nueces, las cáscaras de naranja, las almendras, las avellanas y las cerezas.
Vuelva a poner la masa en un bol. Tape otra vez bien flojita y deje leudar al doble en un sitio tibio.
Una vez que la masa haya leudado, divídala en dos porciones. Estire cada porción de masa sobre la mesa enharinada, y déle forma oval con un espesor de unos dos centímetros aproximadamente.
Pinte la superficie de cada ovalo, generosamente, con manteca derretida.
Ahora, doble cada ovalo de masa por la mitad, como si fuera a armar una empanada gigante.
Una vez moldeados así los stollen, levántelos cuidadosamente y acomódelos en placas enmantecadas y enharinadas.
Tápelos flojamente y ¡déjelos leudar nuevamente! No se desanime que ya queda poco…
Cocínelos en horno caliente hasta que queden doraditos.
Retire los stollen del horno, píntelos exageradamente con manteca derretida y enseguida ahogüelos con azúcar impalpable tamizada.
Déjelos enfriar sobre una rejilla y… ¡a la carga!

{Pan de molde livianísimo, Blanca Cotta}

{Medialunas caserísimas, Blanca Cotta}

martes, 6 de septiembre de 2016

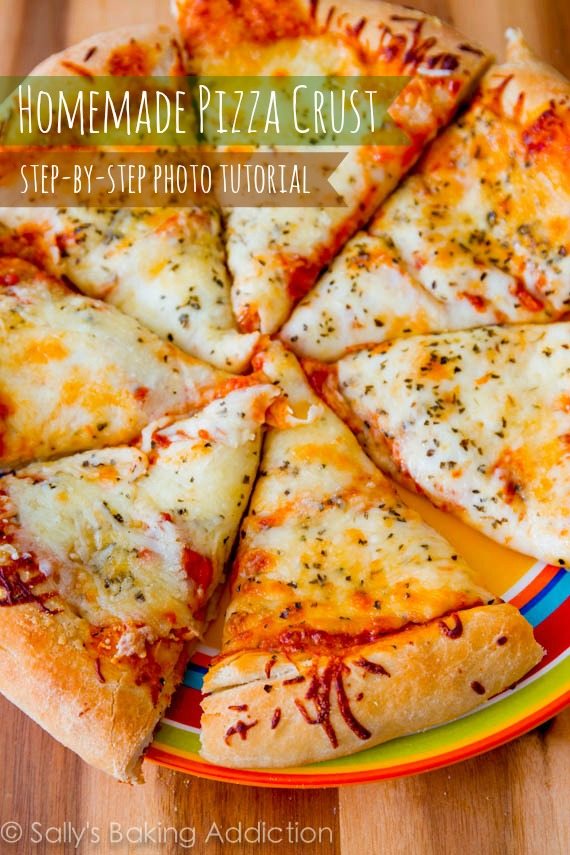
{Homemade pizza crust}

How to make Homemade Pizza Crust. A step-by-step photo tutorial by sallysbakingaddiction.com

En el mercado

All pizza doughs recipes are different, but they typically all have the same ingredients: flour, yeast, water, salt, oil, and some may have sugar. Here is the breakdown of what I use in my recipe.

Yeast. I use Red Star Platinum yeast. I have the best results in my breads when I use their platinum line. Though I am being compensated for sponsoring Red Star Yeast, please know that I’ve been an avid user ever since I began to bake with yeast. Their Platinum line is fantastic; its careful formula strengthens your dough and makes making working with yeast simple. I use only enough yeast to get the job done; I don’t like pizza dough to taste “yeasty.” (Technical terms here, of course.) 1 standard packet (2 and 1/4 teaspoons) is what you need for my pizza crust recipe.

Water. I tested this recipe with many different amounts of water over the past few weeks. I find that 1 and 1/3 cups is the perfect number. Please use lukewarm water (105F – 115F). Anything over 120F will kill your yeast.

Flour. Please use unbleached all-purpose white flour in this recipe. Bleaching the flour strips away some of the protein, which will affect how much water your flour absorbs in this recipe. You may use bread flour instead, but you’ll have to increase the water by a couple Tablespoons since bread flour contains more protein than all-purpose. I do not know how to make this pizza crust gluten free. For the best results, just stick to the recipe as written.

Oil. Extra virgin gives this pizza crust the best taste. You’ll also line your bowl with olive oil as the dough rises and brush your dough with olive oil before layering on the toppings. This prevents the crust from getting soggy from the toppings.

Salt. Salt gives my pizza crust a little flavor. Pizza dough without salt tastes bland regardless of the toppings. I tested with two different amounts and 3/4 teaspoon is perfect.

Sugar. I add a touch of sugar to my pizza dough recipe. Sugar increases the yeast’s activity, while salt can control it. Furthermore, a slight touch of sugar will tenderize your dough, especially when paired with the olive oil.

Cornmeal. Not all pizza dough recipes use cornmeal to dust the pan, but I prefer it. The main reason you sprinkle cornmeal onto the bottom of your pizza pan is so that the pizza won’t stick to the bottom of the pan. It gives the pizza crust a little flavor and crispy texture as well. You could just use regular flour to dust the pan, but you’ll lose the flavor cornmeal provides.
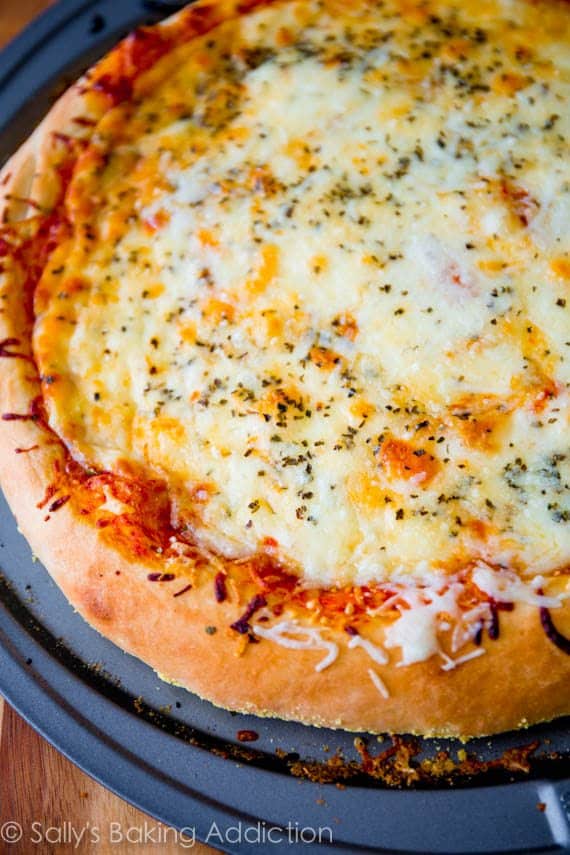
How to make Homemade Pizza Crust. A step-by-step photo tutorial by sallysbakingaddiction.com

How to make Homemade Pizza Crust. A step-by-step photo tutorial by sallysbakingaddiction.com

Freezing Instructions

It’s important to know that this recipe is enough to make two 12-inch pizzas. If you do not need two pizzas, here are the freezing instructions:

After the pizza dough has risen and you divide the dough in half to form into two pizzas (step 7), you may freeze one of the balls of dough to make a pizza at a later time. Or you may simply freeze both balls of dough, separately. Lightly spray all sides of the dough ball(s) with nonstick spray or lightly coat all sides with olive oil. Place the dough ball(s) into individual zipped-top bag(s) and seal tightly, squeezing out all the air. Freeze for up to 3 months.

Thawing Instructions

Put your frozen pizza dough ball(s) in the fridge overnight or for about 12 hours to thaw. When ready to make the pizza(s), remove the dough from the refrigerator and set out on the counter to rest for 30 minutes and come to room temperature. Continue with step 8.

Do NOT feel overwhelmed. I made sure to break everything down very easily, so a lot of the text in this recipe is me being as thorough as possible. Be sure to use the photos below this recipe as a visual guide.

Sally’s tip: Be gentle with your dough at ALL times. Let your dough rest as I instruct in the recipe below. It’s fragile and should be handled with care.

Porciones: 2 pizzas de 30,5 cm
Tiempo de preparación: 2 h y 15 m
Tiempo total: 2h y 30 m

Follow these easy instructions for creating a thick & chewy pizza crust at home. I do not know how to make this pizza crust gluten free. For the best results, just stick to the recipe as written.

En el mercado

2 y 1/4 cucharitas de té de Red Star Platinum yeast (1 standard packet, 7g)*
1 y 1/3 tazas (320ml) de agua tibia (105-115F degrees)
3 y 1/2 tazas (440g) unbleached all-purpose flour, plus more as needed
2 cucharadas (30ml) de aceite de oliva
3/4 cucharitas de té de sal
1 cucharadas (13g) de azúcar granulada
Harina de maíz, para empolvorear la pizzera

En la cocina

1) En un bowl grande (or the bowl of your stand mixer fitted with a hook attachment), combinar la levadura con el agua tibia. Mezclar y dejar reposar durante 5 minutos, o hasts que la levadura esté espumosa y disuelta. Esto se llama "proofing" la levadura. Si la levadura no se disuelve, la levadura está "muerta". Comienza de nuevo con levadura activa.

2) nd warm water. Stir it around and let sit for 5 minutes of until the yeast is foamy and dissolved. This is called "proofing" the yeast. If the yeast doesn't dissolve, your yeast is dead. Start again with active yeast. Add flour, olive oil, salt, and sugar. Mix by hand or with the dough hook on low speed for 1 minute.
Once all of the ingredients are mixed, knead for 7 minutes by hand or with your dough hook on low-medium speed. If your dough is too wet, add up to 1/4 cup more flour. After kneading, your dough should be smooth and elastic. Poke it with your finger - if it slowly bounces back, your dough is ready to rise. If not, keep kneading.
Shape the dough into a ball and place in a large mixing bowl that has been coated lightly with olive oil. Turn it over to coat all sides. Cover tightly with plastic wrap and allow to rise in a warm environment (about 75F-80F).
For the warm environment, I heat up my oven to 200F. Then, I turn the oven off and keep the door slightly ajar (I opened it wide for this picture). This will be a warm environment for your dough to rise. After about 30 minutes, I close the oven door to trap warmish air inside with the rising dough.
Depending on your type of yeast, your dough will have doubled in size in about 1 - 2 hours. I use Red Star Platinum and my dough took 1 hour, 20 minutes.
Punch the dough down to release the air.
Divide the dough into two. Roll each half into a ball and let rest in two separate bowls lightly covered for 15 minutes. You may freeze one of the dough balls at this point to use at a later time. Please read above in the post for freezing instructions.
Preheat oven to 475F degrees. Allow to heat for at least 30 full minutes. Every inch of your oven needs to be very, very hot. Grease and dust 2 baking sheets with nonstick spray or with olive oil. Sprinkle with cornmeal (preferred for flavor and texture) or flour (not preferred). Please read above in the post for why cornmeal is preferred.
Prepare your favorite toppings. May I suggest my recipe for a simple extra cheese pizza?
After 15 minutes, flatten each ball of dough 1 at a time on a lightly floured surface or on a silicone baking mat. You could also do this directly on your cornmeal lined pizza pan. Flatten into a 12-inch round circle, flattening and stretching the dough. If using a pizza stone, place the dough directly on baker's peels dusted with cornmeal.
Lift the edge of the dough up to create a lip around the edges. I simply pinched the edges up to create the rim like this. To prevent the filling from making your pizza crust soggy, brush the top lightly with olive oil. Using your fingers, push dents into the surface of the dough to prevent bubbling. Let rest for 15 minutes before topping.
Top with your favorite toppings and bake for 12-15 minutes. For the last minute, I move the oven rack to the top rack to really brown the edges. That's optional.
Slice hot pizza and serve immediately. Store leftover pizza covered tightly in the refrigerator and reheat as you prefer. Baked pizza slices may be frozen up to 1 month.
Additional Notes:

*You may also substitute active dry yeast on an equal basis for the instant yeast. Expect an approximately 50% slower rise time.
© SALLY’S BAKING ADDICTION. All images & content are copyright protected. Please do not use my images without prior permission. If you want to republish this recipe, please re-write the recipe in your own words, or link back to this post for the recipe.


1) In a large mixing bowl or the bowl of your stand mixer fitted with a hook attachment, combine the 1 packet of yeast and 1 and 1/3 cups warm water. Stir it around and let sit for 5 minutes or until the yeast is foamy and dissolved. This is called “proofing” the yeast. If the yeast doesn’t dissolve, your yeast is dead. Start again with active yeast. Add 3 and 1/2 cups flour, 2 Tablespoons olive oil, 3/4 teaspoon salt, and 1 Tablespoon sugar. Mix by hand or with the dough hook on low speed for 1 minute:
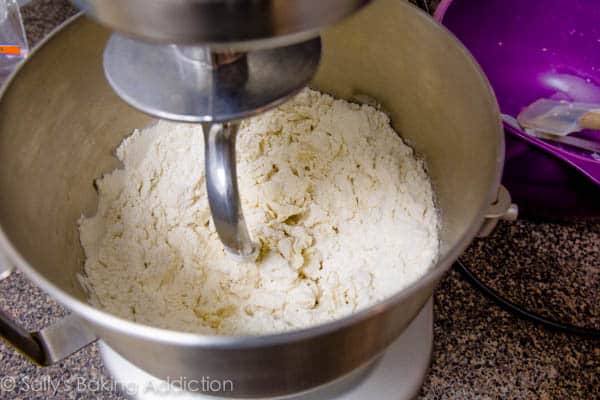
How to make thick-style homemade pizza crust. Step-by-step visual tutorial on sallysbakingaddiction.com

2) Once all of the ingredients are mixed, knead for 7 minutes by hand or with your dough hook on low-medium speed. If your dough is too wet, add up to 1/4 cup more flour. After kneading, your dough should be smooth and elastic. Poke it with your finger – if it slowly bounces back, your dough is ready to rise. If not, keep kneading.

Here is my dough halfway through mixing with the dough hook (after about 3 minutes).
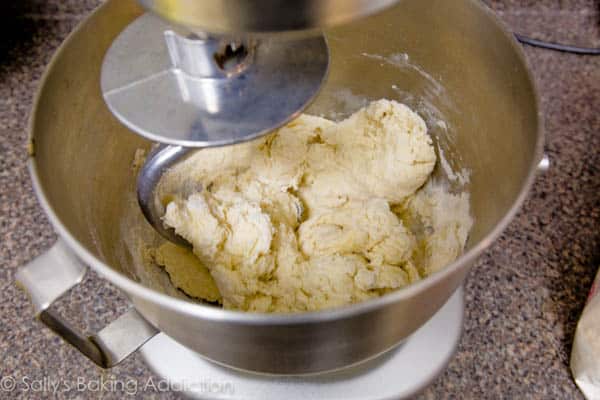
How to make thick-style homemade pizza crust. Step-by-step visual tutorial on sallysbakingaddiction.com

Here is my dough when it is ready to rise, after 7 minutes:
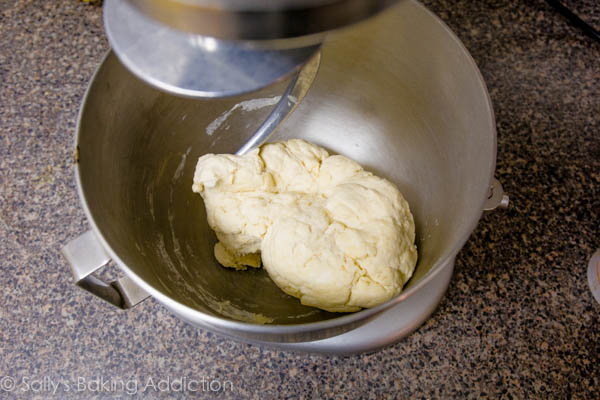
How to make thick-style homemade pizza crust. Step-by-step visual tutorial on sallysbakingaddiction.com

3) Shape the dough into a ball and place in a large mixing bowl that has been coated lightly with olive oil. Turn it over to coat all sides. Cover tightly with plastic wrap and allow to rise in a warm environment (about 75F-80F).
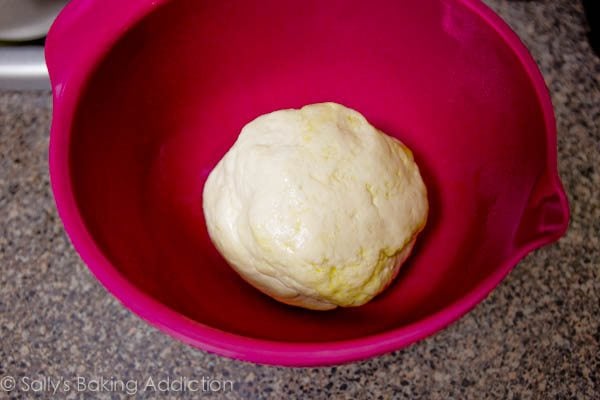
How to make thick-style homemade pizza crust. Step-by-step visual tutorial on sallysbakingaddiction.com

4) For the warm environment, I heat up my oven to 200F. Then, I turn the oven off and keep the door slightly ajar (I opened it wide for this picture). This will be a warm environment for your dough to rise. After about 30 minutes, I close the oven door to trap warmish air inside with the rising dough.
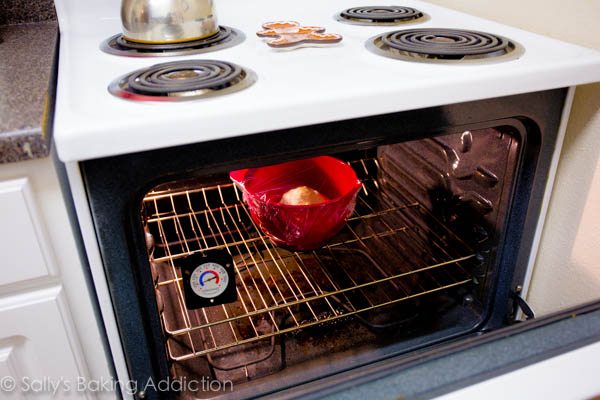
How to make thick-style homemade pizza crust. Step-by-step visual tutorial on sallysbakingaddiction.com

5) Depending on your type of yeast, your dough will have doubled in size in about 1 – 2 hours. I use Red Star Platinum and my dough took 1 hour, 20 minutes.
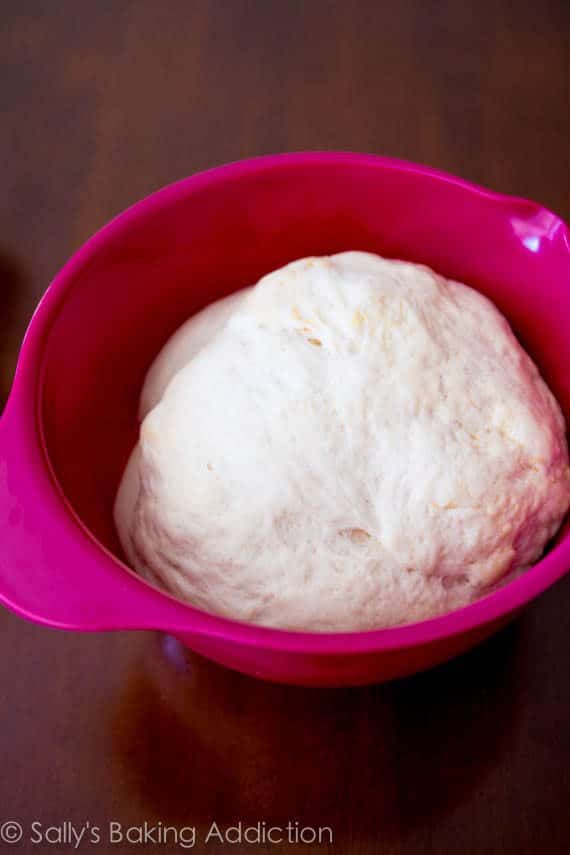
How to make thick-style homemade pizza crust. Step-by-step visual tutorial on sallysbakingaddiction.com

6) Punch the dough down to release the air. Watch it deflate!
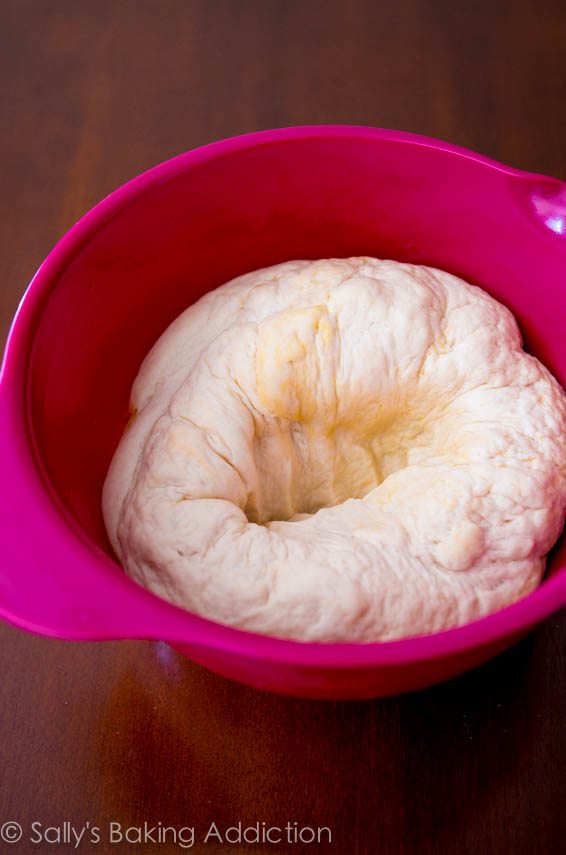
How to make thick-style homemade pizza crust. Step-by-step visual tutorial on sallysbakingaddiction.com

7) Divide the dough into two. Roll each half into a ball and let rest in two separate bowls lightly covered for 15 minutes. You may freeze one of the dough balls at this point to use at a later time. Please read above in the post for freezing instructions.
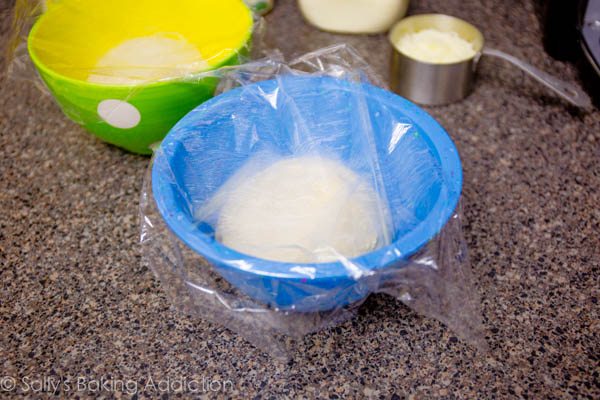
How to make thick-style homemade pizza crust. Step-by-step visual tutorial on sallysbakingaddiction.com

8) Preheat oven to 475F degrees. Allow to heat for at least 30 full minutes. Every inch of your oven needs to be very, very hot. Grease and dust 2 baking sheets or pizza pans with nonstick spray or with olive oil. Sprinkle with cornmeal (preferred for flavor and texture) or flour (not preferred). Please read above in the post for why cornmeal is preferred.
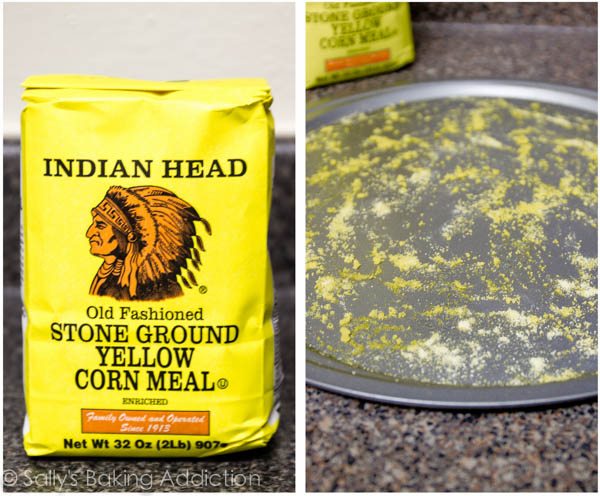
How to make thick-style homemade pizza crust. Step-by-step visual tutorial on sallysbakingaddiction.com

9) Prepare your favorite toppings. May I suggest my recipe for a simple extra cheese pizza? 🙂 Use homemade tomato sauce if you prefer.
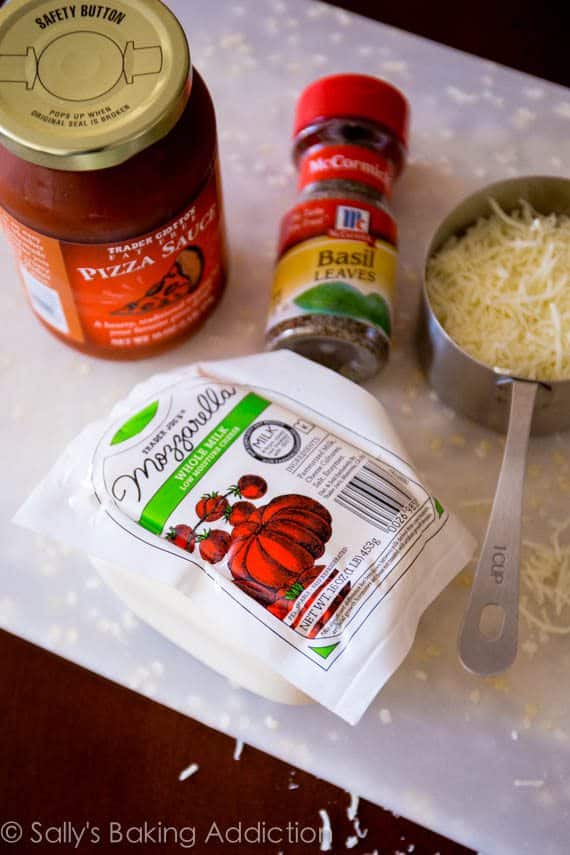
How to make thick-style homemade pizza crust. Step-by-step visual tutorial on sallysbakingaddiction.com

10) After 15 minutes, flatten each ball of dough 1 at a time on a lightly floured surface or on a silicone baking mat.
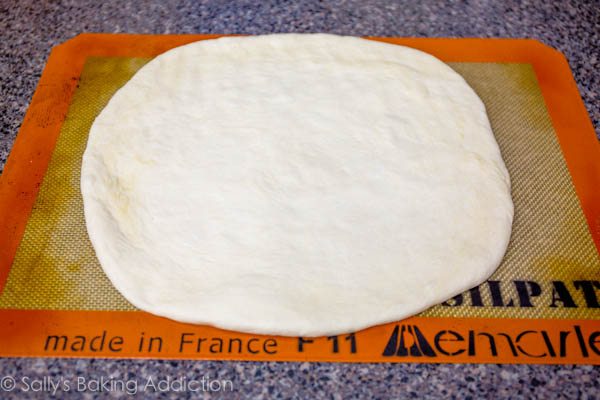
How to make thick-style homemade pizza crust. Step-by-step visual tutorial on sallysbakingaddiction.com

*You could also do this directly on your cornmeal lined pizza pan/baking sheet.

Flatten into a 12-inch round circle, flattening and stretching the dough. If using a pizza stone, place the dough directly on baker’s peels dusted with cornmeal.

11) Lift the edge of the dough up to create a lip around the edges. I simply pinched the edges up to create the rim like this. To prevent the filling from making your pizza crust soggy, brush the top lightly with olive oil. Using your fingers, push dents into the surface of the dough to prevent bubbling. Let rest for 15 minutes before topping.
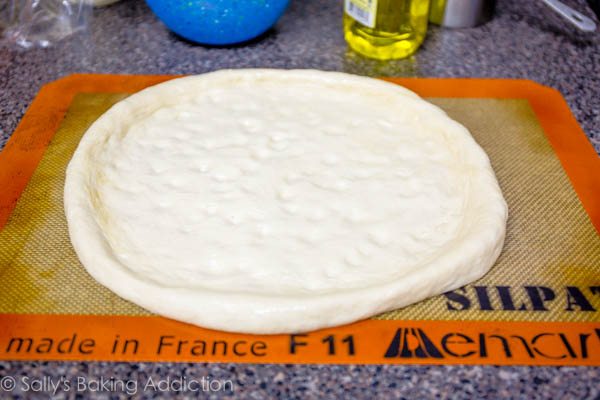
How to make thick-style homemade pizza crust. Step-by-step visual tutorial on sallysbakingaddiction.com

12) Transfer to your pizza pan, baking sheet, or pizza stone. Be gentle. Top with your favorite toppings and bake for 12-15 minutes. For the last minute, I move the oven rack to the top rack to really brown the edges. That’s optional.
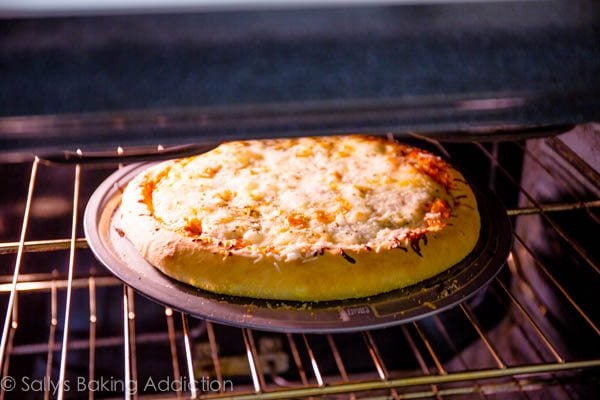
How to make thick-style homemade pizza crust. Step-by-step visual tutorial on sallysbakingaddiction.com
13) Slice hot pizza and serve immediately. Store leftover pizza covered tightly in the refrigerator and reheat as you prefer. Baked pizza slices may be frozen up to 1 month.

Fuentesallysbakingaddiction.com